Create a beautiful pattern on a manicure is easiest with a needle, accurately drawing it. This way of designing nails is relatively fast, and you should not think that you need to be an artist for this. The main thing is to approach this case prepared: to choose a scheme, to decide on the shades of varnish, to prepare the necessary materials and workplace. The result is sure to please, because with the help of a needle on the nails, you can draw even the most subtle details, which can hardly be made even with the most thin brush.
Technique of drawing on nails with a needle
- Remove all remnants of the old coating thoroughly with a nail polish remover.
- Cover the nail with varnish, which will serve as the main tone of the future drawing. You can apply two layers.
- Do not wait until the main varnish withers, apply a droplet of varnish of a contrasting hue for the details of the pattern.
- Use the needle to draw the lines in the required directions according to the pattern diagram.
- Then the pattern is covered with a fixer for reliability.
Useful tips for performing manicure with a needle
At home, it is recommended to start a manicure with a non-working hand, then the network, if you're right-handed, then with the left, and vice versa. So the drawing will be more quickly mastered.
It is better to start with the little finger, so as not to accidentally hurt the already decorated nail.
If the work of the needle is inconvenient for you, you can upgrade it, for example, insert it into the pencil, after removing the lead from it. It will be more convenient to apply a drawing.
Do not force the needle heavily when drawing, this can lead to scratches on the nail plate.
Examples of drawing on nails with a needle
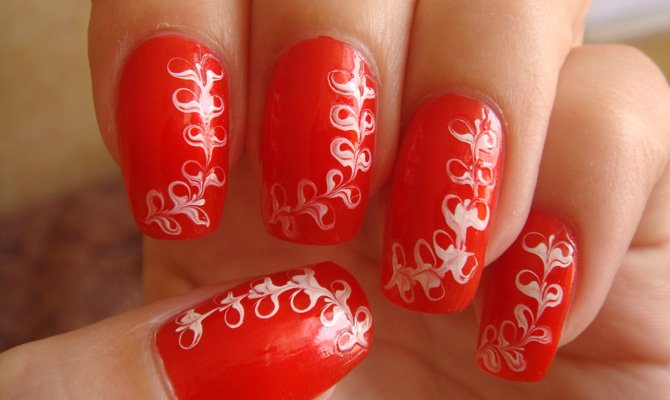
Drawing "White branch on a red background"
This pattern can create the illusion of a complex pattern, but when performing an uncomplicated branch, the pattern is given quite easily. You can choose different colors of varnish. The main thing is that their combination pleases the eye.
For this picture you need: a needle or toothpick, two varnishes of contrasting colors. After finishing the decoration of the manicure, it is recommended to use a fixer.
Technique of execution: the nail plate is uniformly covered with a varnish of the main background (it is possible in two layers). While the main varnish is not dry, a small drop is applied in a semicircle in a contrasting color. The distance between them should be 2-3 millimeters, which will allow them to stretch in the future.
Then, with a toothpick or a needle, movements that resemble the sign of infinity are performed. Thus, the droplets are stretched into a pattern. It is necessary to perform such a procedure quickly, until the varnish has dried, then the picture will turn out to be glory.
These manipulations with a needle are carried out on each nail alternately. At the end of the nails should dry for about five minutes, after which they are applied a colorless varnish to fix the result.
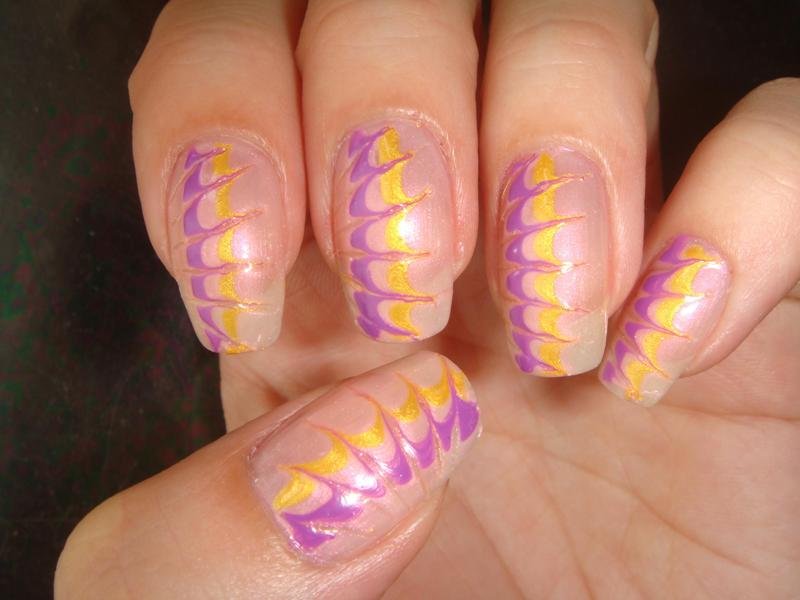
Drawing "Pink idyll"
Gently pink color is great for any manicure. It is widely used in the decoration of nails as a background color. He looks great with a dress of any style.
For this drawing, you need a pink lacquer as the main background, varnishes of violet and yellow-gold tone for drawing, a needle, a fixer.
Technique: the nail plate is neatly covered with a varnish of pink color. The coating should be uniform with completely painted edges of the nail. Then, on a "wet" lacquer, a thin strip of violet should be carried out with a thin brush of lacquer. This strip should extend evenly from the base of the nail to its free edge. It should be located about 1/4 of the distance from the side edge of the nail. Further parallel to the purple strip, orienting the center of the nail, you need to carefully hold the yellow-gold stripe. All this should be done quickly enough, otherwise the drawing will not work.
Further manipulations are reduced to the fact that the needles from the side edge of the nail plate to the opposite side of the "rays of the sun", crossing both traced lines.
The same actions are performed on all nails. Dry dried patterns are fixed with a special fixer or clear varnish. This will not only fix the picture and give the artistic manicure extra shine.