Make-up is applied to the face in order to refresh it, hide the defects of the skin and face structure, give the desired image. Make-up is able to transform any person, both in the best sense, and in the opposite. Improperly applied makeup can make a person rough, look vulgar and even add looks a few years, that is, produce the opposite effect. To prevent this, every woman must learn the necessary minimum, become a make-up artist herself. In this article, nine lessons are taught, teaching how to correctly apply cosmetics to the face.
So, lesson number one
Before doing make-up, you need to prepare the skin and then the make-up on your face will lie "like clockwork" in an even layer, will not "stray" and crumble. For cleansing, you can use any special remedy suitable for your skin type. It does not matter what you choose - if only you liked it. It can be: foam, gel, tonic or lotion.
lesson number two
After cleansing, be sure to apply a moisturizing cream with a light texture to the face, and for oily skin also with matting effect. This is one of the main rules of how to correctly apply cosmetics to the face. After the cream has absorbed, apply a tonal cream on your face with cautious circular motions. The choice of cream should be taken with all seriousness. Never use a cheap cream with a heavy texture if you have wrinkles, otherwise an additional five years of age will immediately be provided to you. If you want to look younger, do not use dark tones, it is better to choose pinkish shades. Do not forget about the neck, so as not to cause contrast and not look, at least, ridiculous. Minor skin defects, as well as dark circles under the eyes, are smeared with correctors at the initial stage.
It is very good to use for the application of foundation cream sponge. But it must be remembered that the sponge should be washed with soap every two days and not used it more than 15-20 times, and also it absorbs some of the cream, which is somewhat uneconomical.
To prolong the make-up will help to sprinkle the skin of the face with thermal water, after applying a foundation.
lesson number three
The next step is the application of powder. Powder is friable, compact, mineral, creamy. The latter is applied in a thin layer by circular movements with your fingers. Others are applied with a brush or a puff by quick movements (circular), without rubbing into the skin. Correctly applied powder covers the face with an even, hardly noticeable layer. To do this, shaking off the brushes (with a puff) remnants of rapid brushing movements remove excess powder. Loose powder can make a matt face and prolong the period of applied makeup. Powder with reflective particles will make the face a couple of years younger and give the skin a healthy look.
lesson four
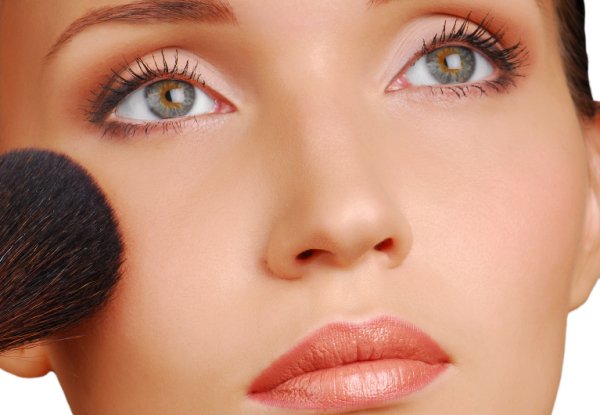
Next comes the turn of blush. They are also applied with a brush. It is necessary to "dab" the brush in blush and "draw" a strip along the prominent area of the cheekbone.
It is necessary to start from the outer corner of the eye and lead to the hair line. Then rub the edges with your fingers. To make the face fresh, apply a blush in the center of the forehead, above the eyebrows and chin and thoroughly blend. Here the blush should be almost invisible.
lesson number five
Now we will work on eyelashes. Mascara is applied with light sweeping movements (the brush position is horizontal) first on the upper row from the inside. Try to apply so that eyelashes do not stick together. If necessary, apply several layers. Then apply mascara on the lower eyelashes, turning the brush vertically. After the eyelashes dry out, they must be combed with a special brush or brush from the carcass, which you have already finished.
lesson number six
Let's do the shadows. Light shadows are applied to the upper eyelid, starting from the nose, avoiding the area above the fold. Then draw a line from the outer corner (under the lower eyelashes) until the middle of the century and slightly shade with the fingers. The fold of the upper eyelid is emphasized in a darker tone and also rubbed. The area under the eyebrows is covered in white or light pink tone, carefully shading and repeating the bend.
lesson number seven
The outline of the eyes is drawn with a special pencil of black, green, brown, gray and other colors. The finished contour should resemble the letter V. It is necessary to start from the outside of the eye, drawing the upper and lower eyelid, slowly moving to the inner corner, emphasizing the line of growth of the eyelashes. The edges are also slightly shading. On the lower row of eyelashes the contour is drawn both along the entire length, and up to half. If you need a more permanent make-up, you can use it to apply a liquid line.
lesson number eight
At the next stage, we emphasize the eyebrows. In order to make the eyebrows clear and expressive we will use a special pencil. To create the illusion of natural hairs, you need to put a little pinnate streaks. To give the eyebrows density and width, we first draw them with a beige pencil and already apply strokes on top. If the eyebrows are wide and beautiful from birth, they are slightly corrected with tweezers.
lesson number nine.
The final stage is make up lip. For him, you will need proper shine and lipstick, a contour pencil and a special flat brush. The pencil must be sharply sharpened, they initially draw the center of the upper lip, then draw the line to the corners. A clear and even line is obtained due to short movements. Then the contour of the lower lip is drawn. Lipstick is better to apply with a brush short strokes also from the center to the edges. If desired, the contour can be shaded with lipstick, or do not touch it at all. In order to carefully apply lipstick on the corners of the mouth, you need to slightly open your mouth with the letter O. In order for the lips to look expressive and seductive, apply gloss. If you are afraid that the shine will spread, apply it to the central area of the lips.
To keep the lipstick on for a long time, after it was applied it is necessary to get wet lips with a light napkin and carefully powder it with a very thin layer. Then apply another layer of lipstick, if desired, repeat the manipulation with shine.
If you want to give your lips some volume, you can put a little pearl into the center of the lips.