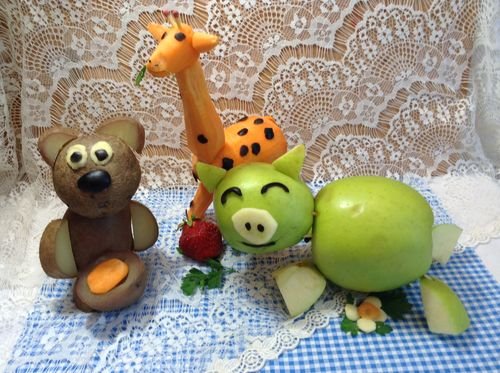
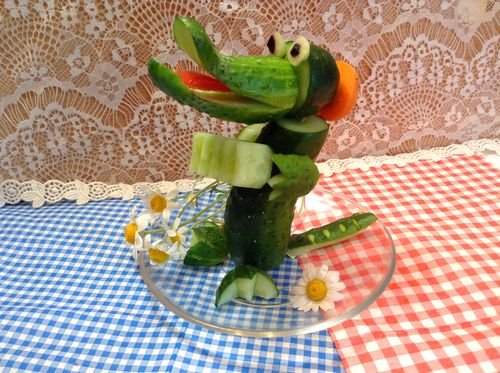
Handmade from cucumbers and carrots "Crocodile Gena" with their own hands
How to make hand-made articles from vegetables and fruits? The figure should not be complicated and at the same time be as much as possible similar to the interesting and well-known children of the character. In addition, it should not contain rare and little-known ingredients.
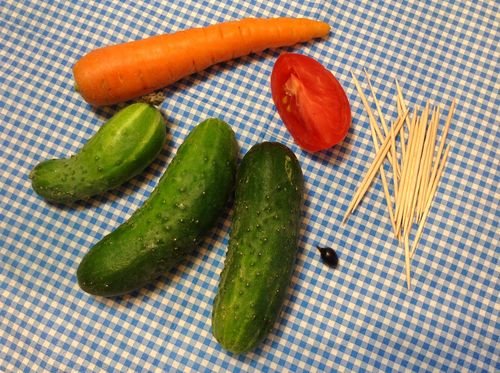
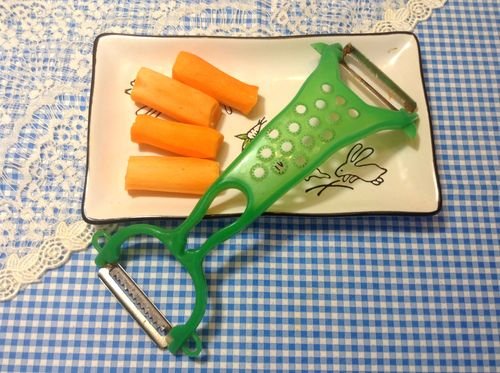
Necessary materials:
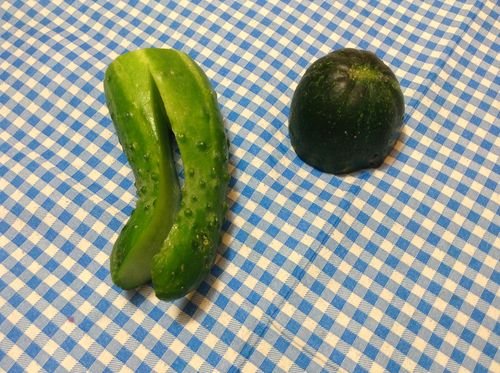
- 3 cucumbers (one of them must be small and clearly rounded, others - of medium size, with slight bends);
- black olives or currants;
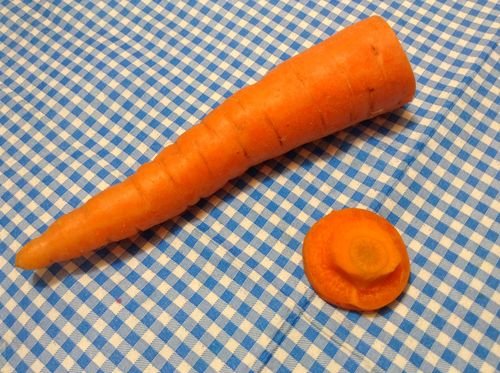
- carrot;
- toothpicks (not less than 5 pcs);
- a quarter of a ripe tomato;
- sharp knife;
- board for easy operation (optional).
On a note! Prepare vegetables for work. Choose cucumbers of a special form. For the craft, you need 3 cucumbers, but it's worth making a stock in case any item does not work out the first time, especially if it's a hobby for children. Vegetables well wash and dry or dry.
"Crocodile Gena" from vegetables - a master class
-
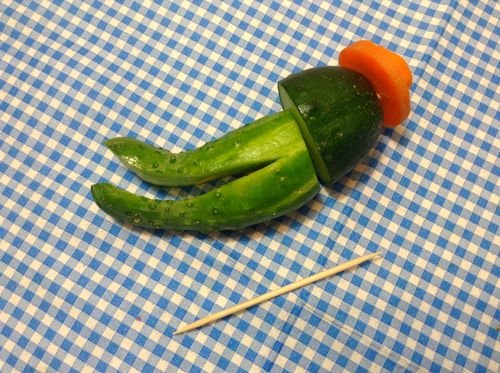
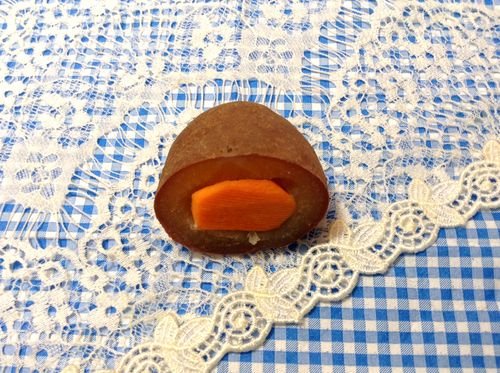
Cut the smallest crooked cucumber from one side. On the other - make a deep incision and cut out the triangular piece of the core. Prepare a slice of a larger cucumber for the head. It is desirable that it is highlighted in a darker tone. -
From the top of the carrot, cut out the bonnet. You can also make an air scarf, but this will require carrots longer than in the photo. -
Fix the details of the head of the crocodile with a toothpick. Our craft has already begun to acquire characteristic outlines! -
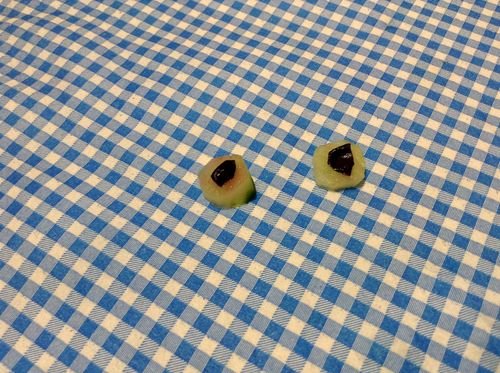
From light cucumber cuttings, cut two circles for eyes. From olives or black currants, make pupils. -
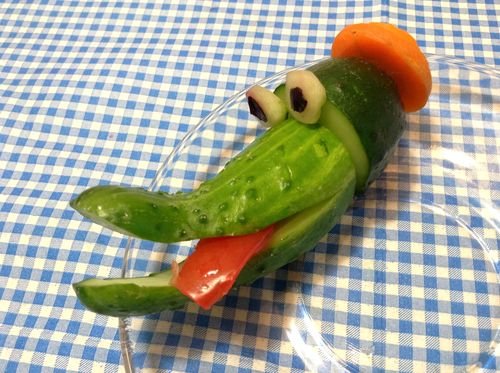
Eyes gently attach to the head of the crocodile pieces of toothpick. Put a strip of tomato into your mouth. -
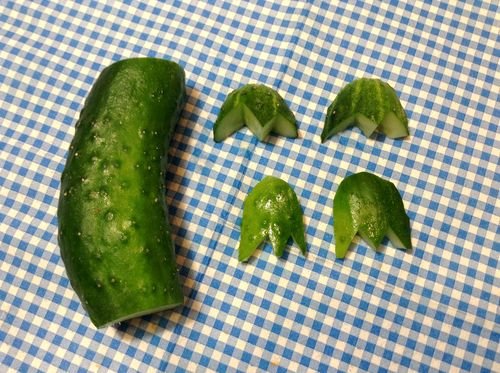
Cut the largest cucumber at the edges. From the cucumber scraps, cut two pairs of paws, as shown in the photo. The front feet should be slightly smaller. -
On a rectangle of a cucumber core, make incisions for the visibility of the accordion, as shown in the photo. -
Attach the upper paws and accordion to the body with pieces of toothpick. With one toothpick, connect the head to the body. Cut out the tail from the scraps and put it on the plate with a pair of lower paws. These details are not necessarily attached to the body, however, if desired, you can attach the tail and "legs" to the cucumber of the trunk. Handicraft of cucumbers with your own hands ready!
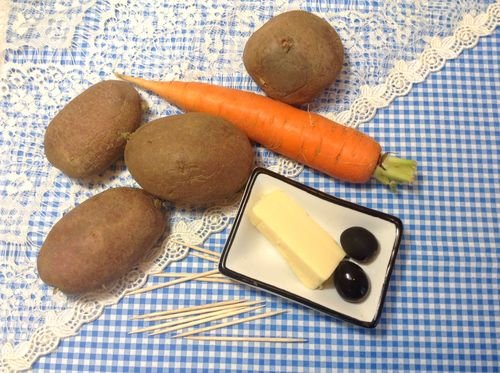
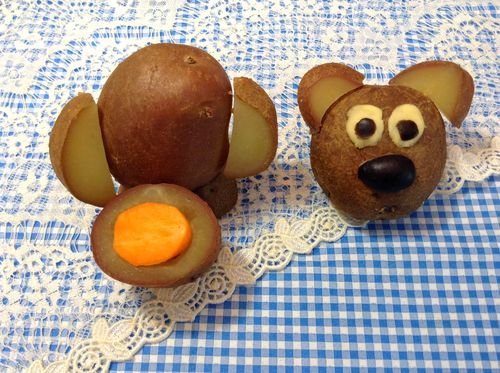
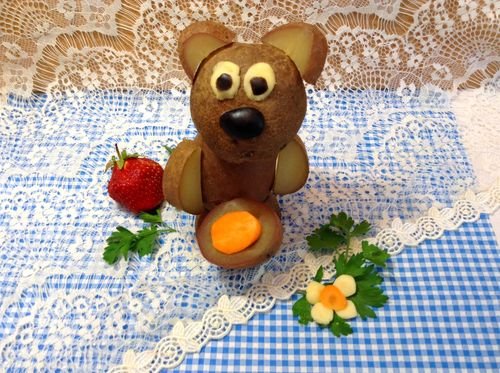
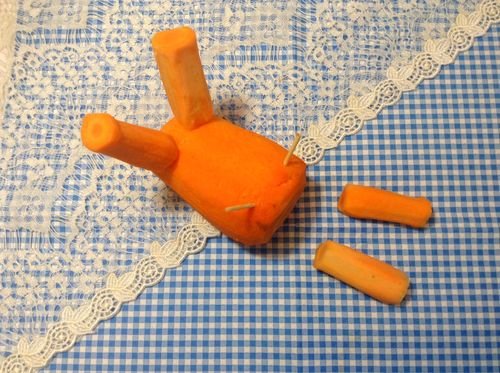
Handmade from potato "Bear with a barrel of honey", master class with a photo
Potatoes are an excellent basis for handicrafts. If you decide to make a toy out of it, do not use the raw material in raw form. To ensure that potatoes do not darken and do not lose an attractive appearance, it should first boil for a short time. In moderation, soft potatoes are easily pierced and cut, keep in shape and serve as a cheap base for crafts for the kindergarten and school.
Necessary materials:
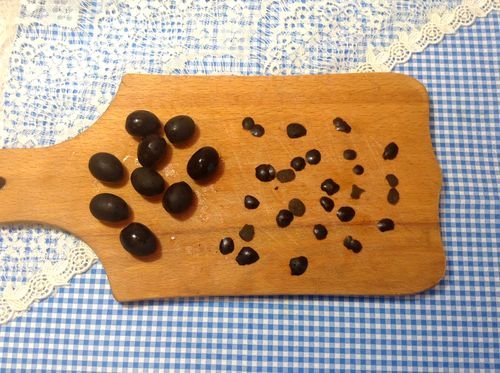
- 4 elderly potatoes (3 small and 1 medium);
- 2 black olives;
- toothpicks (not less than 10 pcs.);
- sharp knife;
- a piece of processed cheese;
- carrots (enough will be one small disk).
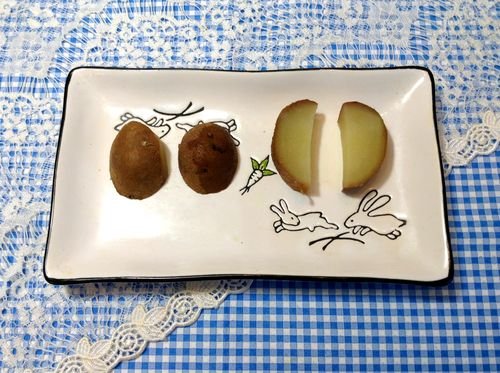
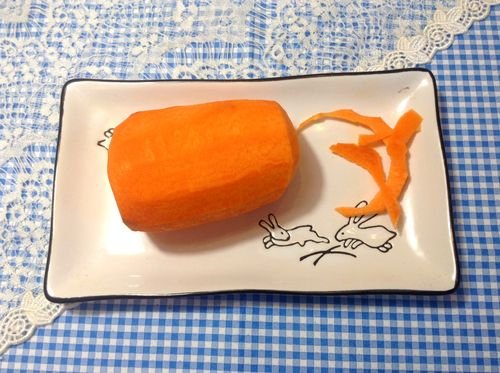
Note! Choose from the largest available potatoes for the trunk of the craft, and the most round for the head. Prepare all materials and products, wash carrots and potatoes. Cook the potato, but not until ready. For pottery made from vegetables, the potato should remain firm and at the same time find the color of the boiled vegetable.
"Bear with a keg of honey" from vegetables - step by step instruction:
-
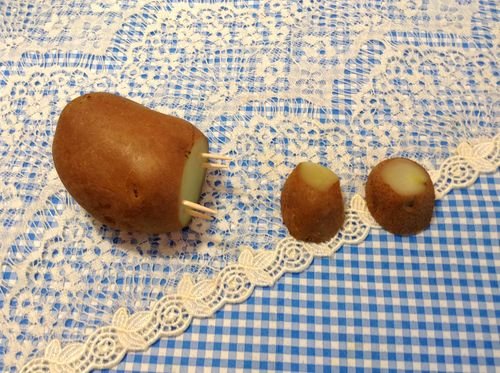
From 1 small potatoes make paired details for the paws, as shown in the photo. Lower legs should be flat - this will ensure the stability of the whole figurine of vegetables. -
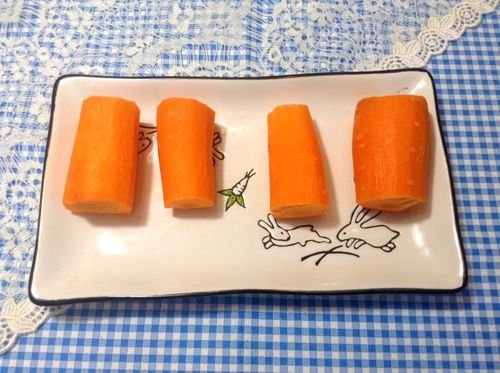
Cut the other small potatoes in half. Inside, make a small notch and put a thin carrot disk into it. It will be an imitation pot with honey for our crafts. -
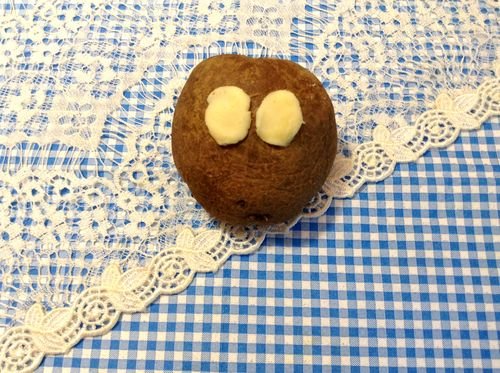
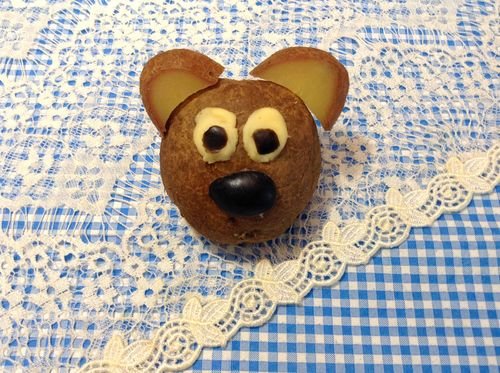
From soft soft cheese make ovals and paste to the head of a bear. -
From the olive, carefully cut a large oval for the nose and round pupils. Attach the details to the head with soft cheese. -
From the remains of potatoes cut out the ears, as shown in the photo, and attach them to the head of the bears with pieces of toothpicks. -
Slightly cut the details of the lower legs and trunk to improve the stability of our potato figurine. Firmly join 4 toothpicks. -
Attach the upper paws and the "pot with honey" to the teddy bear's body. -
Finish the hand-made potato yourself, connecting the head with the body. The bear should be well balanced by a "pot of honey" in front.
Attention! To eat a figure from undercooked potatoes is not recommended, especially for children.
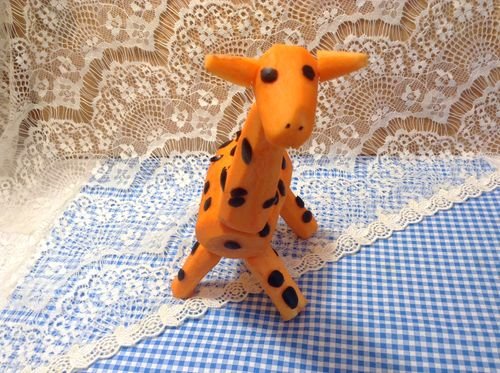
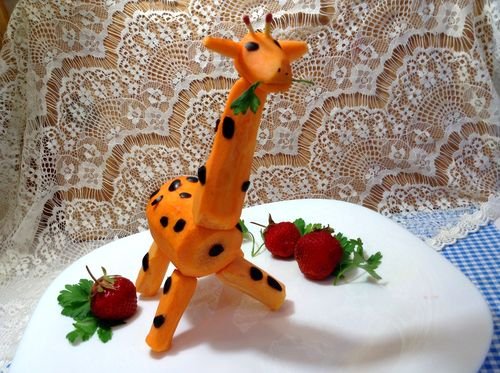
Handmade carrot with his own hands "Giraffe" - master class with photo
A carrot giraffe made by own hands is a bright and interesting hand-crafted item that children will surely like, both in kindergarten and in school.
Necessary materials:
- 3 young carrots (2 small and 1 larger);
- a dozen black olives;
- 2 ordinary matches;
- toothpicks (not less than 10 pcs.);
- sharp knife;
- a special knife for cleaning vegetables.
On a note! Prepare all materials and products for crafts from carrots. Carrot wash and wipe or dry. Remove the olives from the jar. Clean all carrots.
"Giraffe" from vegetables by own hands - step by step instruction
-
From a large carrot cut a piece from a wide edge. Slightly round the shape of the body of the future giraffe, as shown in the photo. -
From two thinner carrots cut 4 oblong details of the same thickness. -
Make these 4 pieces the same thickness. To do this, it is recommended to use a knife for cleaning vegetables, especially since this method will be safer if the craft is for a kindergarten. -
From the remaining piece of large carrots, cut 2 parts: the head and the long neck, as shown in the photo. The workpiece of the neck needs to be made thinner with a knife, so that the figurine of vegetables is proportional in size. -
Two toothpicks break in half and attach the legs of the giraffe to the body. -
With a piece of toothpick, attach the head piece to the long neck, and then plant the whole structure on the trunk with a single long toothpick. -
Cut out thin mugs and details of different shapes from olives. Do as much as you see fit to decorate your giraffe from a carrot. -
Stick the pieces of olives to our carrots, first dipping the parcels in a marinade from under the olives. Be sure to make giraffe eyes and nostrils. From carrot scraps make the ears and attach to the head. Advice! To facilitate the work, children can make giraffe specks an ordinary black marker or a felt-tip pen, however there is no such giraffe in any case.
-
Insert in the vertex 2 pieces of matches nestle up - these will be the horns of a giraffe. On the head, carrot crafts can be made with a knife a small incision for the mouth and put a twig of green. Attach the tail of the scraps from behind. Our work is ready!
On a note! A ready-made hand-made vegetable soup is not recommended once again to move. It is better to put a giraffe from carrots on a plate.
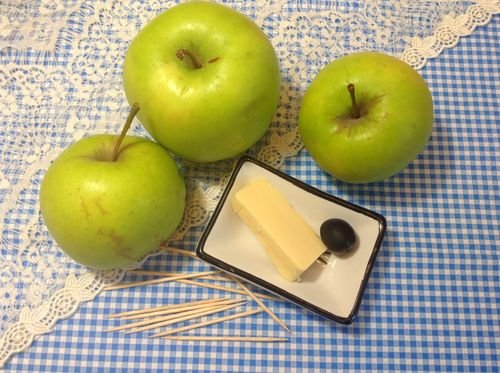
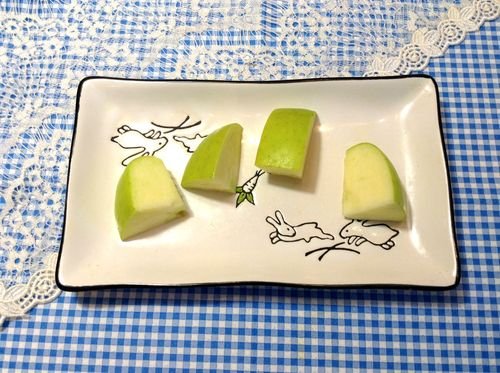
Piece of apples "Piglet" with their own hands
Make a pretty piglet of apples is very simple - this fruit has a dense skin and a smooth surface, and choosing a variety of apples will affect the appearance of your pig.
Necessary materials:
- 3 apples of Golden variety (2 small and 1 larger);
- black olive;
- a piece of processed cheese (optional);
- toothpicks (not less than 10 pcs.);
- sharp knife.
On a note! Fruits wash and towel dry. Apples are desirable to choose smooth and monophonic, without any natural patterns or flaws. Golden is the best choice, but you can also experiment with red sweet varieties.
Making of fruit by yourself - step by step instruction
-
The largest apple puncture 3-4 toothpicks obliquely from the petiole, as shown in the photo. It is better to conceal the shard under the head of the pig, so as not to spoil the craft. -
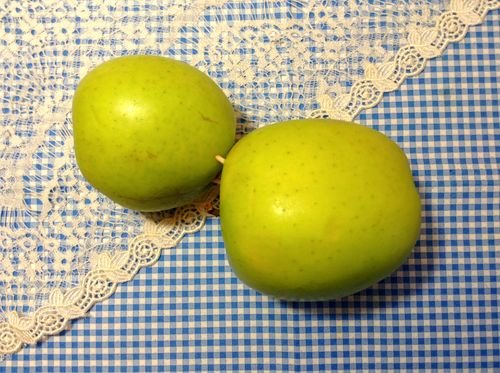
Connect 2 apples: the trunk and the pig's head. -
From the third apple cut wide bars of approximately the same size - this will be the pig's hoof. Do not make these details too thin, otherwise the figure will be unstable. -
Attach the legs to the body of the figure. This can be done with whole toothpicks or halves. It all depends on the ripeness of the apples: if the fruit is too soft and ripe, it is better to pierce them completely with whole toothpicks. Take into account that the body of the piglet will get heavier than the legs. -
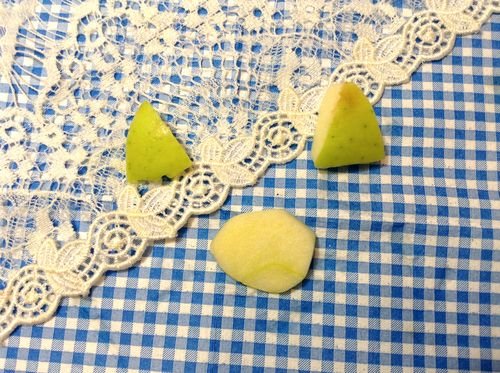
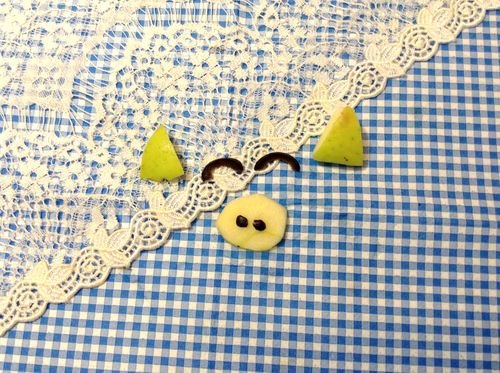
Cut out 2 pyramids for the ears and one large oval for the patch of remains of the third apple. -
Now, from the olive tree, cut 2 small circles for a penny and 2 arches for the eyes. At this stage, you can use the fused cheese and make a piglet with round eyes with pupils, but if it's a fake of fruit for a kindergarten, it's better to simplify the process and make the eyes follow the example in the photo. -
Piglet attach pieces of toothpick to the head of a piglet. -
For the eyes and mouth, you can make cuts in the apple to fasten the details of olives in them. We advise you to decorate the handicraft with a small tail of apple scraps.