Wetting
Wet felting is the way to create a flat pattern of wool using a soapy solution. If in the manufacture of toys and adornments by the dry method of felting, wool is used from the wool, while the wool is simply laid out, wetted with wool, wetted with a solution, and then rubbed so that it acquires the desired shapes. Very often with the help of a wet felting beautifully decorated with winter scarves. That is why in this article we will go on how to make ruches on a scarf using such a method as a wet felting.
How to make ruches on a scarf with wet felting?
Ruches that are made with the help of wet felting, will become an excellent decoration not only for the scarf, but also for the hem of the skirt, sleeves of the jacket or collars. But now we will talk specifically about how to make such rusikas on a scarf.
For work you will need: fifty grams of wool, mosquito net, bubble wrap. For decoration, we recommend using organza, lace or silk. If you do not like to work with goniards, then you can wear rubber gloves before work. The creation of ryusha Nasharfa as a result should take about two and a half hours, therefore, be on the lookout for the fact that you will have to sit for a while at work.
Now let's talk about the materials that will be used for felting and decorating. If we talk about lace, then they do not need to be processed before starting to felting. The main thing is to make sure that the edge of the lace (especially if it's from the organza) is not too dense, because because of this it can not sit down and the result will not be the same as you imagine it. Dense edge remove. The same advice applies to silk, too.
Another rule of felting lace from organza - the edge should be put a little wool and padded with a needle, so that this edge could then be hooked on the main product.
Before proceeding directly to the step-by-step instructions on how to fray the ruches on a scarf, it is necessary to recall the basic rules of wet felting in general. First, always try to spread the wool evenly, so that there are no empty islands anywhere. Secondly, you need to rub in this direction, in which the wool should sit down. That is, if you start the rubbing along the product - the wool and sit down along, and if across - sitting will cross the product.
Well, now we can proceed directly to the process of felting. First, you need to lay out the wool on a bubble wrap. Remember that as a result, the wool will sit somewhere around thirty percent, so you need to add to the size of the scarf on each side by thirty percent. That is, if the scarf is sixty centimeters in length, then from each side you need to add about seventeen centimeters. Wool should be a thin layer, without spaces, distributing it evenly. By the way, those who have glass tables, we advise you to make a layout for them, first putting a lamp under the table. Thus, it will be better to see how evenly the wool is spread out. The most accurate coat should be laid out on the corners, because it is there where empty spaces can most often remain. First, you need to lay out the wool on the perimeter of the scarf, since it will become our ruches, and then go on to the calculation of the center swarf. Strands should be placed so that they go along and touch the wool that you have already laid out along the perimeter. When you completely lay out the centerwool, located along, you can start spreading it across. After that, a piece of silk or lace is put on the scarf (you can take both, and then another layer of wool is laid out, so that he goes a little silk or lace. After you have laid out the second coat of wool, you can put a little more silk fibers - the takings will look more beautiful.
After you have laid out all the wool, you can proceed directly to the process of wet felting. To do this, you need a mosquito net, which you will cover the product, before you begin to wet it. Watch out for the water to have a temperature of about sixty degrees and soak the wool well, but do not flow with it with a stream. After this, apply a liquid soap or detergent (best of all, Fairy). If you choose a liquid soap, pay attention to the fact that it was not cream. By the way, you can use and laundry soap, but it must be pre-grated and mixed with water. Now, when the wool is sufficiently moistened with a soap solution, you can begin to slowly rub it until the pellets are formed. The skeins are removed from the net, rubbing for about three minutes towards the center.
If you are still touched with water and now the wool is badly falling down - it's okay. You just need to take a towel and gently wipe the scarf.
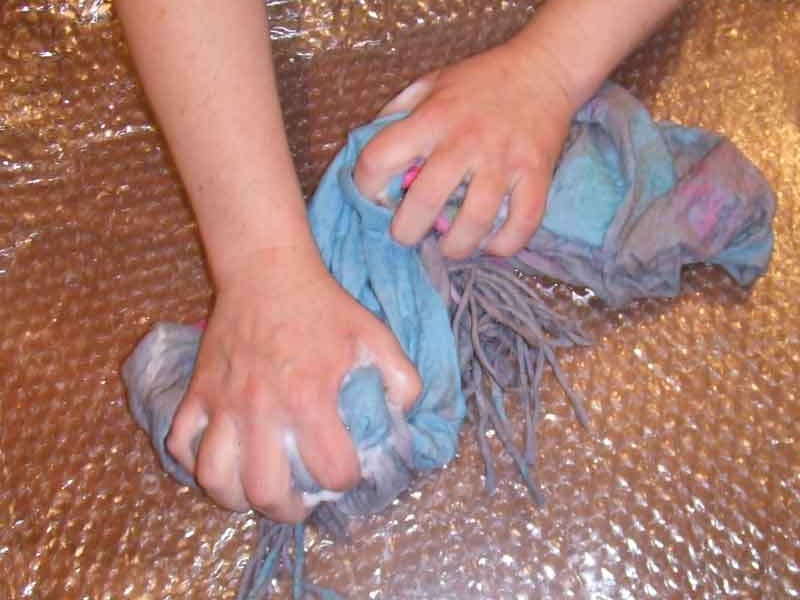
After you have rubbed the wool, turn the product over to the other side and flatten your hands. Here the technique of felting is slightly different: you will need to rub center and across, and flounces - only along, and in the direction in which the fibers are located. When the center is sufficiently seated, the flounces become staggering. Work on the formation of the money will take you about one and a half hours.
In order to understand if your work is ready, you just need to pinch your hair with your fingers. If at the same time only a few fibers separate, then the wool is crocked well enough to finish the job. If a lot of fibers are clinging to the fingers, you need to work a little more.
After you finish decorating the scarf with ruffles, it will need to be gently rinsed to wash the soapy solution. Still advise a little to hold a scarf in the conditioner (that it became soft) and to steam off.
That's all, this is the end of the work, and you can happily wear your new unique scarf that will perfectly emphasize your personality.