The creation of artifacts from natural material is an excellent tool for the development of fine motor skills of children's pens, as well as for their cultural and ecological upbringing. In this master class we will make crafts made of pine cones with our own hands. They are perfect for work lessons in kindergarten and junior school, as well as for family leisure.
Preparation of natural material
Particular attention should be given to child safety. The collected material must be sorted before use. Pay attention to the fact that the collected branches were not with sharp edges; leaves, cones, seeds and flowers were not spoiled by various pests (beetles, caterpillars, aphids).
Technique of making hand-made articles
To make our figurines of cones you need plasticine. Below in the videos are shown the techniques of modeling, which will be used in all the handicrafts of our master class.
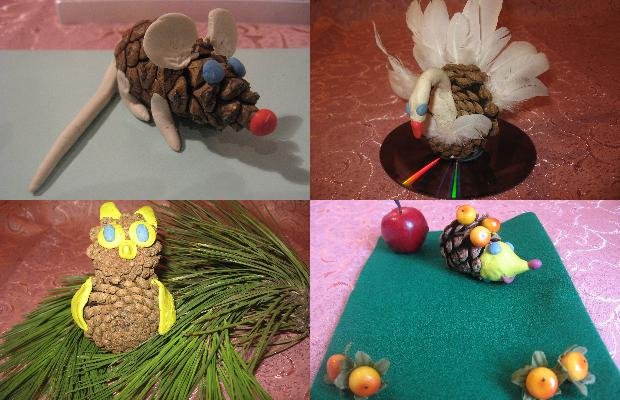
Handmade of pine cones and plasticine "Mouse", master class with photo
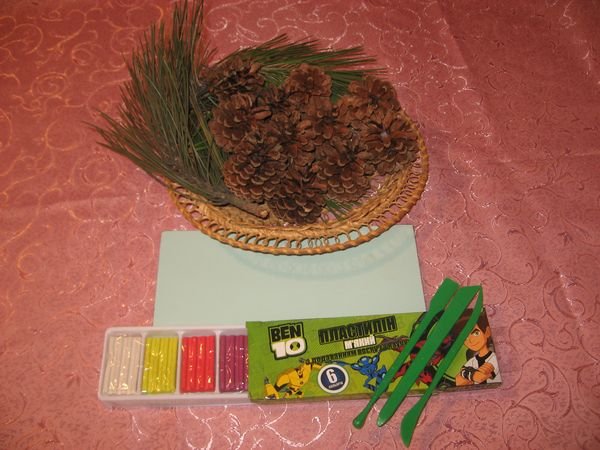
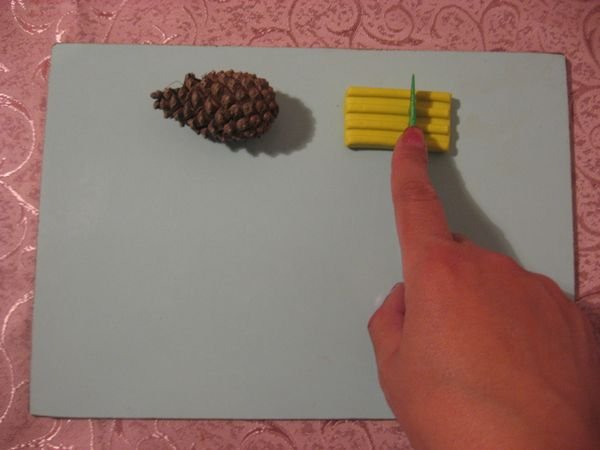
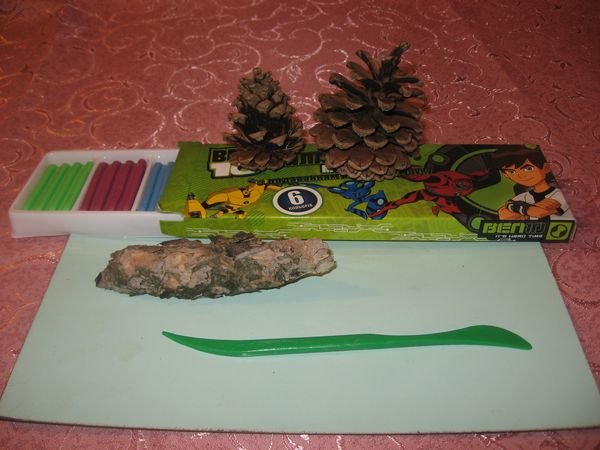
Necessary materials:
- Pine cone
- plasticine
- stacks
- platinum board
On a note! The ideal solution for the manufacture of crafts from cones can be the use of a salted dough, not plasticine. This is cheaper for the family budget and creates additional opportunities for creativity in the process of creating crafts from cones.
Step-by-step instruction:
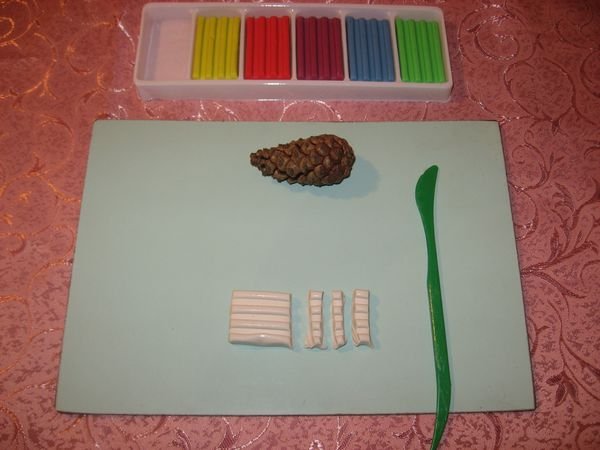
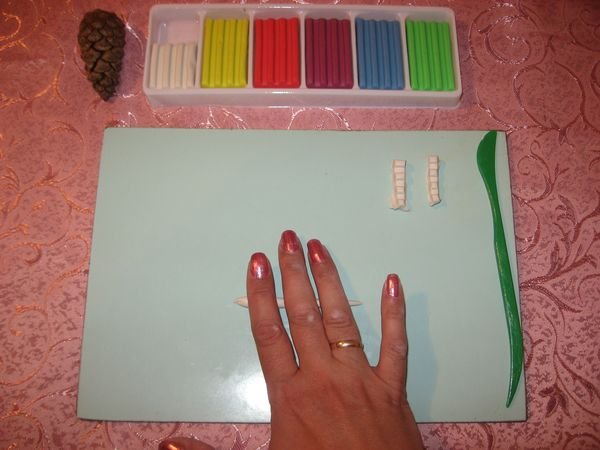
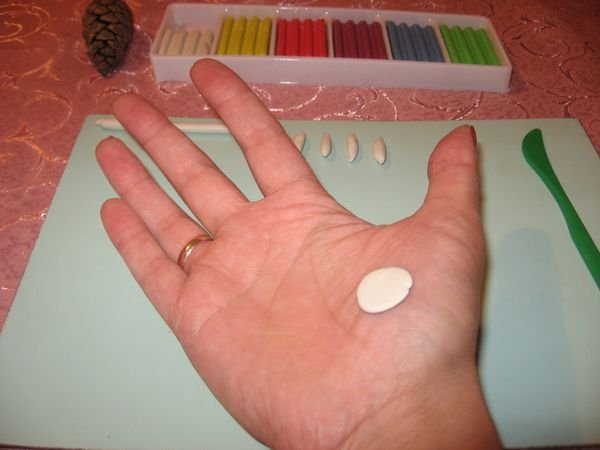
Take a piece of white plasticine and use the stack to divide it into 3 across the piece. The width is about 1 cm. One for the tail. The second one for the ears. The third is for the feet.
We take the first strip and roll out the sausage. This will be the tail of the mouse.
The second strip is divided into four pieces. Using the "rolling" method, we make four sausages. Here are our paws and ready.
The third piece is divided in half. These are blanks for mouse ears. Using the "roll-up" method, we prepare two balls.
Then they are flattened with a "lozenge".
Using the "pinch" method, press one side of our workpiece. So do with both lozhechechkami. Here is our procurement for the ears and ready.
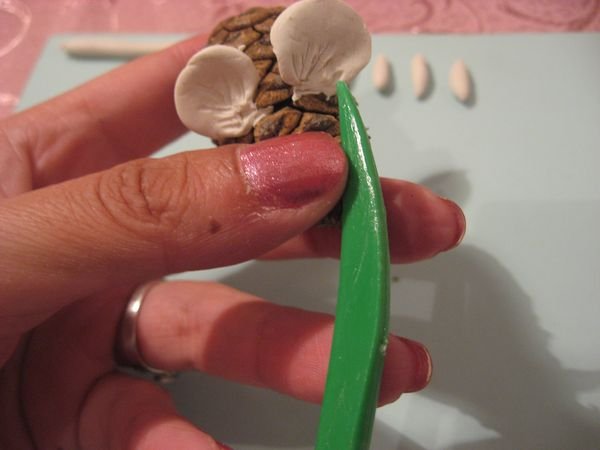
We attach the ears to the cone. With the help of a stack, we put on good clay. For our mouse to hear well, draw a strip of stripes inside the ears.
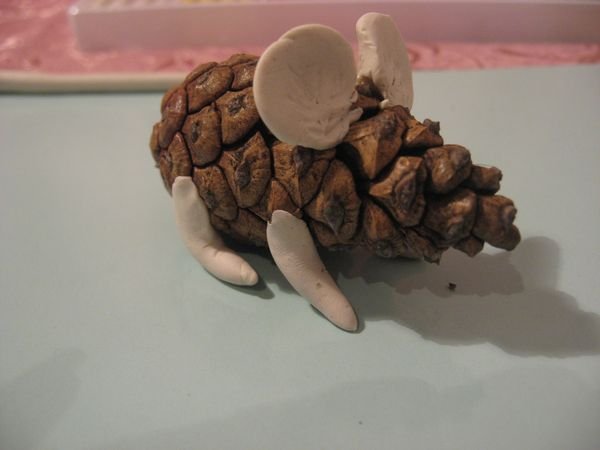
Then attach the paws to our mouse.
Now fasten the tail.
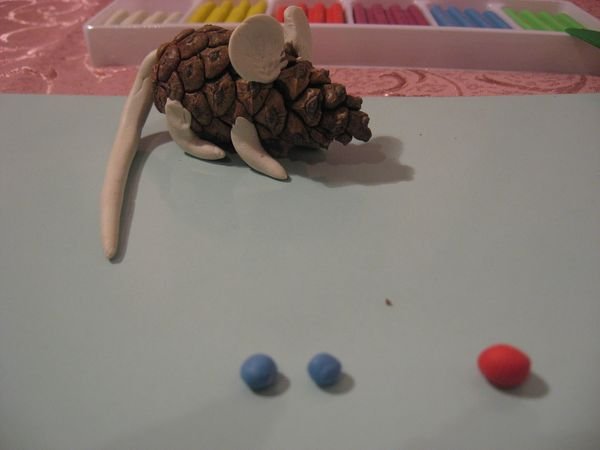
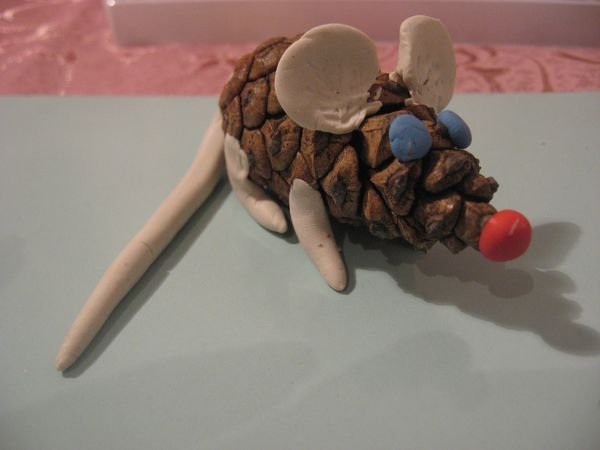
Our mouse must make eyes and a nose. For this we roll three balls. Two blue colors for the peephole, the size of a pea, and the third ball of red color is twice as large, from it we will make a spout for our crafts. Our mouse of cones is ready!
Handmade from pine cones for kindergarten "Hedgehog"
Necessary materials:
- Pine cone
- plasticine
- stacks
- platinum board
Step-by-step instruction:
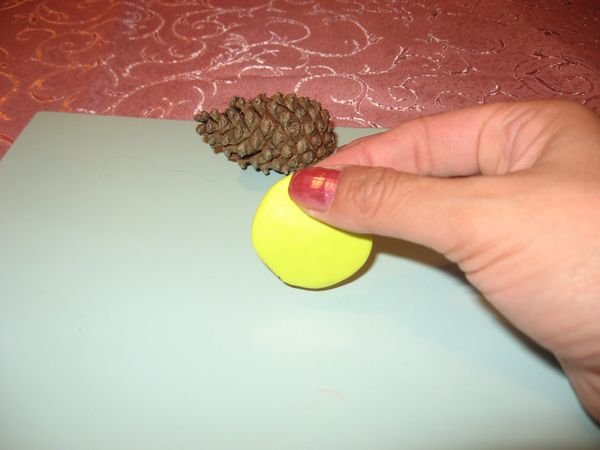
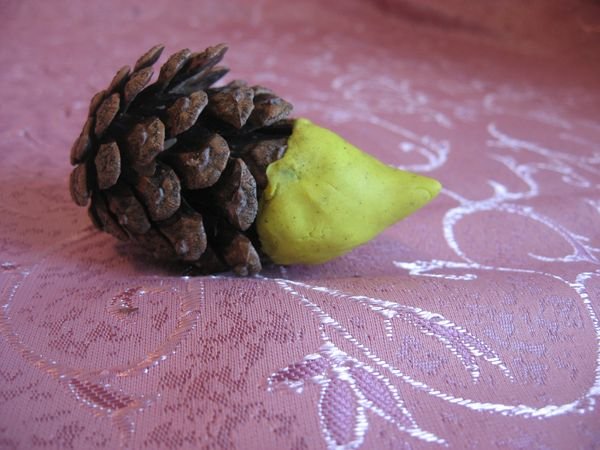
From the yellow plasticine cut off the stack across a strip 2 cm wide.
We roll the ball out of the workpiece. Then we flatten the "lozenge". This can be done by putting the ball on the board and pressing on it with the index finger, or the edge of the palm. You can also use a round pencil or a brush, and roll the clay to the state of a flat cake in the manner of rolling the dough.
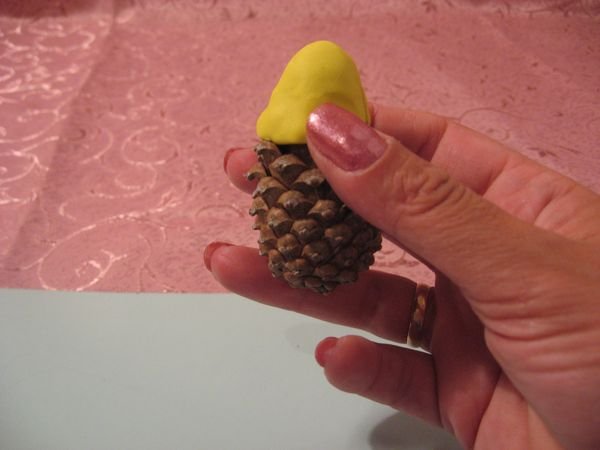
We put the workpiece on the sharp end of a pine cone. We begin to slowly press the edges of the workpiece to the bump in a circle. So we form the muzzle of our hedgehog.
Firmly attaching the clay to the pine cone, we pull the tip and form a spout. It should look like this.
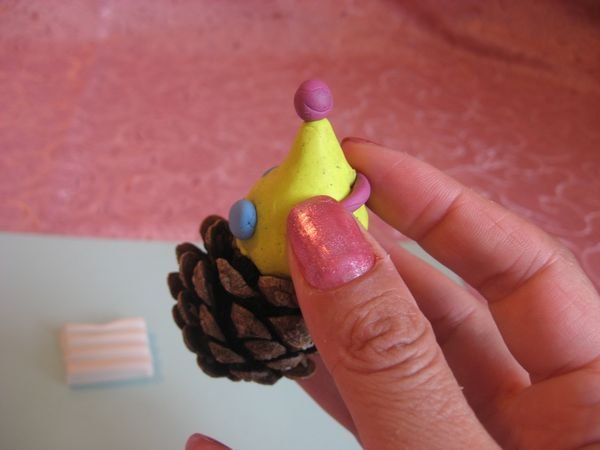
Now our hedgehog needs to make eyes, a nose and a mouth. For this we roll three balls the size of a pea. Two blue colors for the eyes, the third red for the spout. Also from red plasticine we make sausage - this will be the hedgehog's mouth.
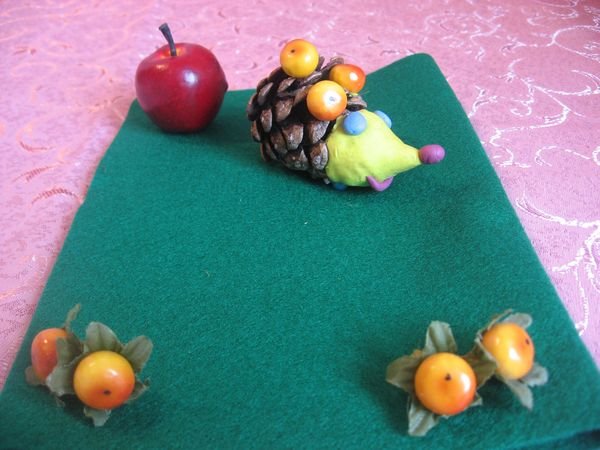
To make the Hedgehog happy, we attach apples to his needles. They can be made from plasticine or take a toy. Our work is ready!
Master classes on making crafts from vegetables and fruits for school and kindergarten, see here .
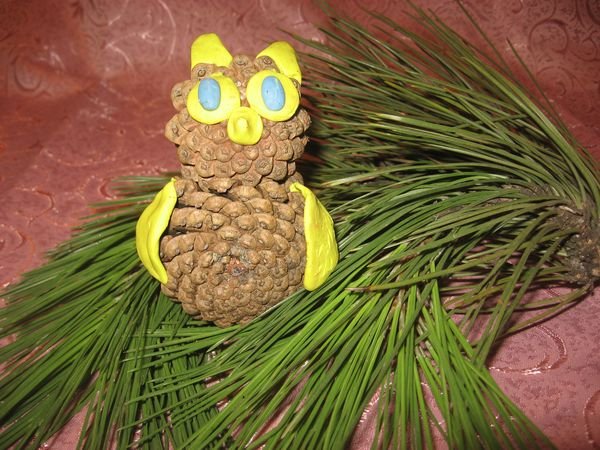
An oddity for the school of cones and clay with his own hands "Owl"
Necessary materials:
- Large pine cone for the trunk
- A small pinecone for the head
- Plasticine
- Stack
- Pine branch
Step-by-step instruction:
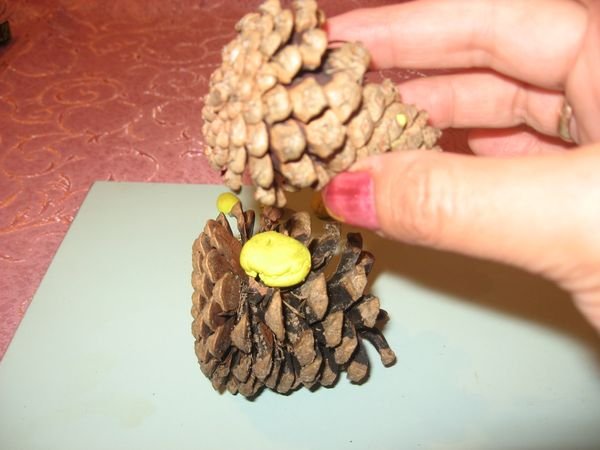
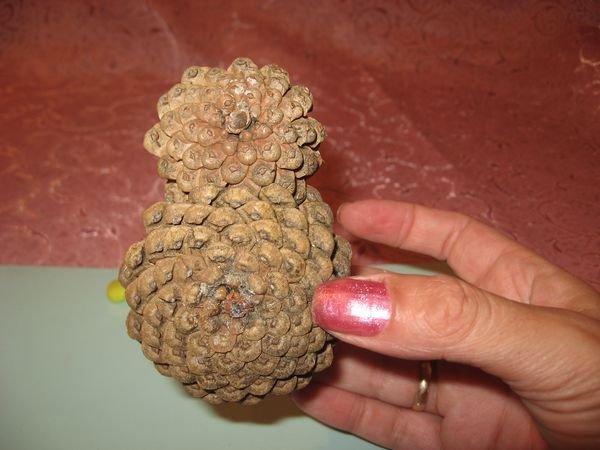
On the side of the big cones, we remove a portion of the scales so that it is convenient to attach a small cone to it. Using a piece of plasticine we connect the parts together.
The base of the craft is ready.
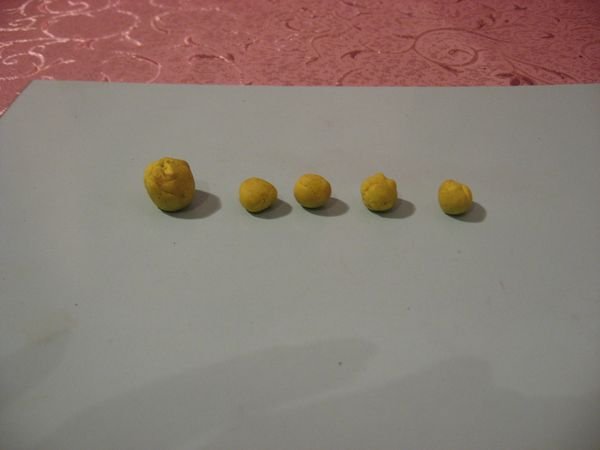
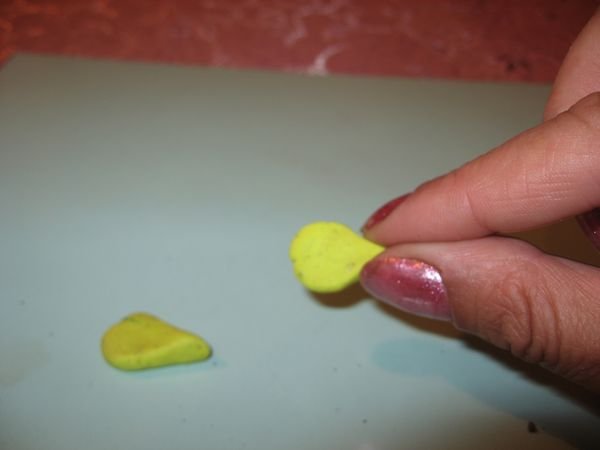
We prepare five balls of yellow plasticine. Two balls the size of a pea - it will be the eyes. Two more balls - the ears of an owl. The largest ball is the size of a nut - a blank for the wings.
We take the blanks for the voice and flatten them in the lozenges. We attach them to the head of crafts.
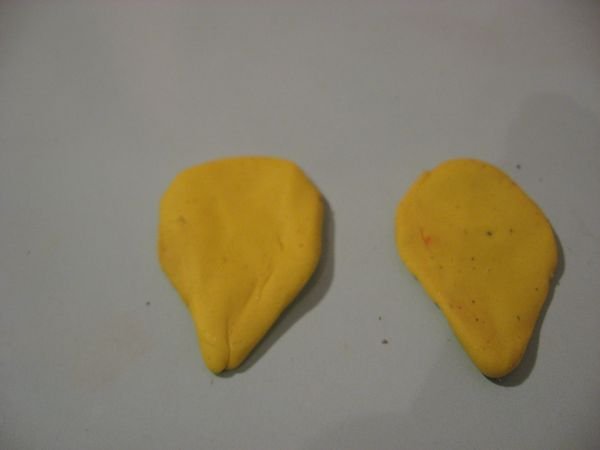
We take the second two blanks and just flatten. We pinch one edge of each lozenge. Ears of an owl are ready.
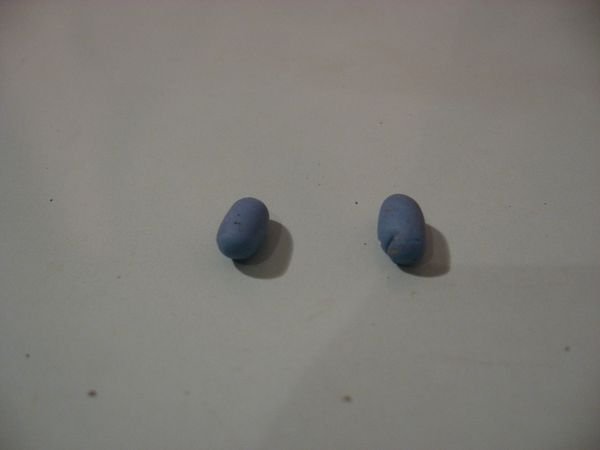
From the blue plasticine roll two rollers. These are pupils for the eyes of an owl.
The biggest ball we divide the stack in half and make wings, on the same principle as the ears did.
We pluck out another piece of yellow plasticine and roll the cone, make of it the beak of an owl.
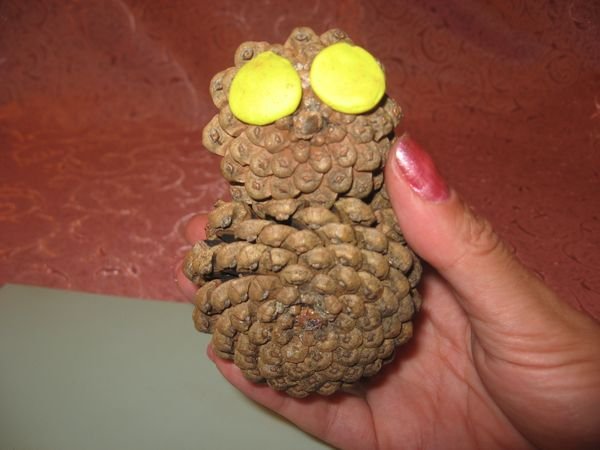
All parts are attached to the workpiece. Our Owl of cones is ready! Now it remains only to plant it on a pine branch. We do this with the help of plasticine.
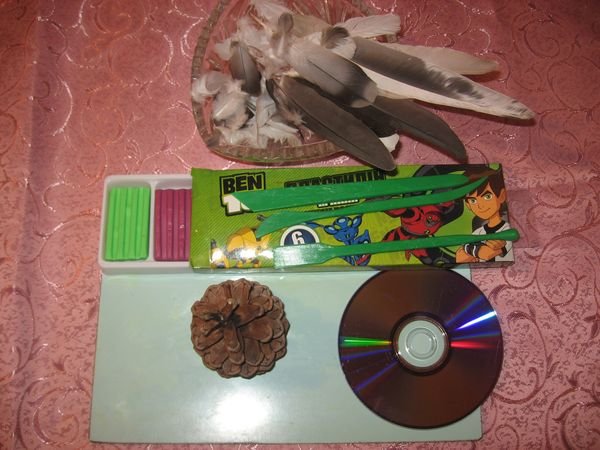
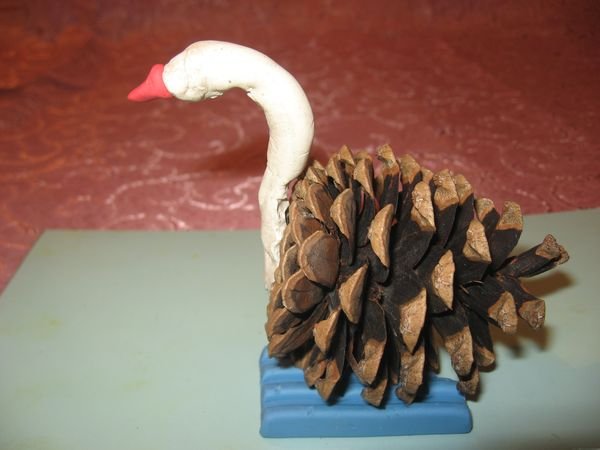
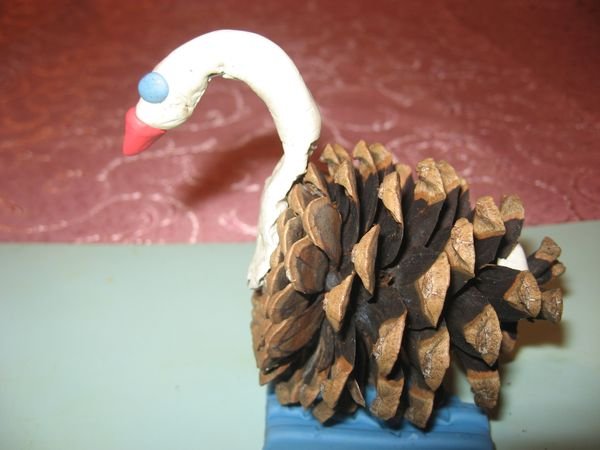
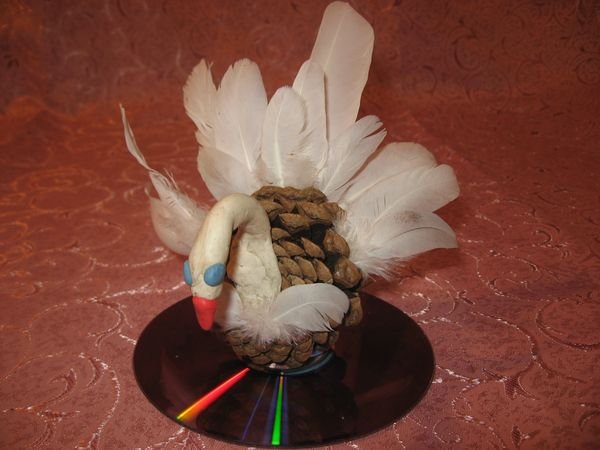
Crafts from pine cones and feathers "Swan" with their own hands, master class with a photo
Necessary materials:
- Pine cone
- Plasticine
- Feathers
- Stacks
- Old laser disk
Step-by-step instruction:
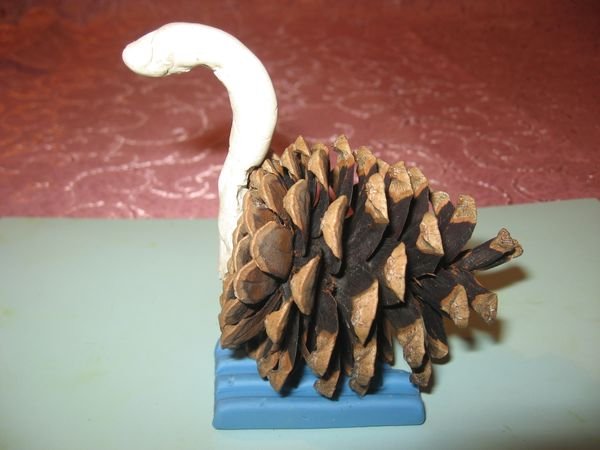
Roll out the plasticine sausage length of about 11 cm. We attach one end of the sausage to the base of the cone. This will be the neck of a swan. Firmly pressing the base of the neck to the bump, we bend the second end of the sausage. This will be the head of Cygnus.
Cut off a piece of red plasticine and roll out of it an oval. We pinch one side of it. It will be the swan's beak. We attach it to the head.
Now we need to make eyes for a swan. For this, we roll two pieces of blue plasticine into small balls. And we attach them to the head of Cygnus.
We choose the feathers we like and with the help of plasticine we attach them to the scales of cones. So we make the tail and the wings of the Swan. Here our handsome man is ready!