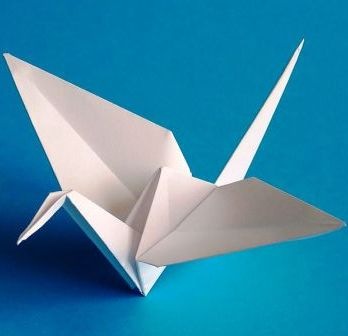
The paper crane is considered throughout the world as a symbol of happiness. As the Japanese legend says: "A man who collected a thousand paper cranes can make any wish and it will come true." Well, for the sake of this, we think it is absolutely necessary to learn how to make origami cranes, in which we will help you.
We make a blank from plain paper
Before making origami cranes, you need to purchase a special paper for origami (it should be thin). This paper can be both monochrome and decorative (have different kinds of patterns). If you do not have the opportunity to buy such paper - use the usual sheet of office paper for printing on an A4 printer. This paper has the form of a rectangular shape, and in order to make the desired figure, we need a square. To obtain the shape of the square, we take the diagonal and fold the sheet so that its two sides (upper and lower) coincide. The extra strip of paper is cut and we get an equilateral triangle. Expanding it, we get a perfect square in shape. After that, it is worth choosing from the origami book (or using the Internet) a scheme on which to fold the crane. There are a variety of options for how to make a bird figure, but for our first time the classical scheme will do. Do not forget to practice first, after making several trial attempts.
Principle of making an origami crane
In order to make a classic crane it is necessary to go through 18 stages. As a rule, in the art of origami there are 11 basic forms, on the basis of which it is possible to make complex figures. As we already know, the base form "square" and "bird" is used to make the crane. So, we begin assembling our crane, basing the figure on the base form of the origami "square". We knit a sheet of paper diagonally (special paper for origami), bend the right corner of our obtained triangle to the left. After that, we squash the upper triangle. On the reverse side, turn the part and straighten the corner in the square. We get our foundation from our paper, over which it is necessary to work a little more to get the origami crane.
Now we have to move the paper layers apart on the sides and make subsequent folds: bend and unbend the right and left edges, and after that, bend and unbend the tip of our figure. Now we need to do similar actions with our reverse side of the figure.
In the next step, we must gently lift the top layer of the diamond and bend it so that it is upward. To achieve this, click on our figure on the sides. Similar actions are done with the workpiece, turning it over to the other side.
As a result, we begin to unbend the layers of paper that are on the sides, and bend the sides of the future crane towards the center. We turn the figure we received to the opposite side and repeat the same actions.
And now we need to push the paper layers along the sides of the already half-finished crane and then bend the sharp edges of the figure upwards. In order for the figure to level out and get the right shape, it is recommended to press it on the sides. Let's move on to the details and their design. We take and bend the tail and beak of the paper crane in different directions. Bend the side of the nose and carefully spread the wings of a paper bird. Want to get a more natural look of your crafts - slightly inflate it with air. So we got an origami crane, which will certainly bring good luck. It remains to make another 999 of these birds, and your most intimate desire will have the full right to its immediate implementation!