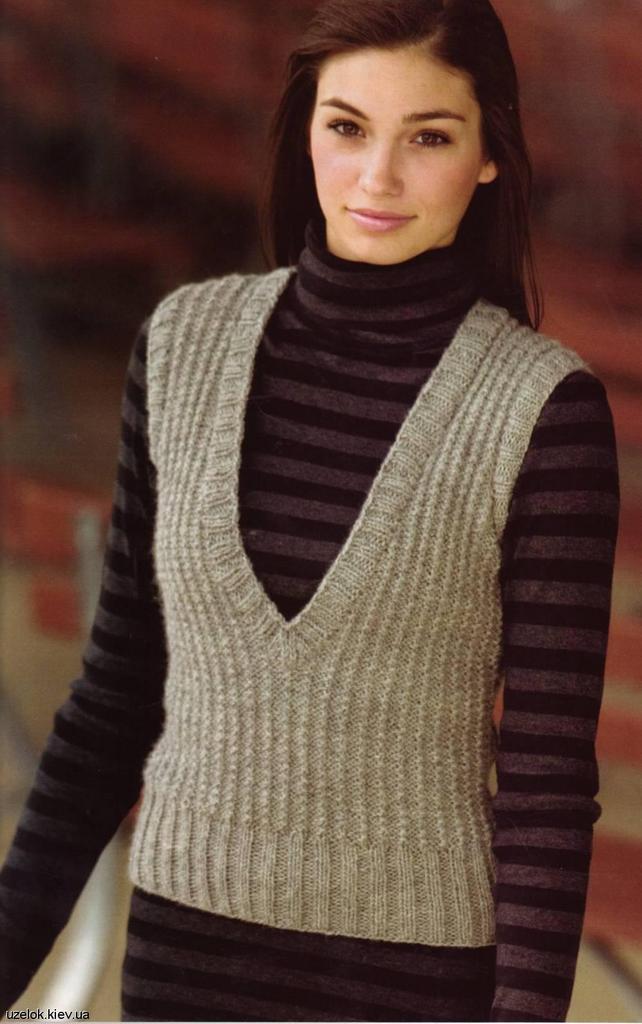
A knitted waistcoat is a versatile garment, it is appropriate in a children's, women's and men's wardrobes. A woolen thick waistcoat will warm in the campaign, an open-work waistcoat will decorate any business suit and even a simple dress will make it elegant. There are many styles of knitted vests, but every woman comes up with her own style. You can knit the waistcoat with one sheet and across, then you will have to connect the shoulder seams.
Knitting Vests
It will take
- 500 g of medium-thickness yarn
- Spokes number 1,5 and number 2
- Pencil
- Graph paper
- Paper
- Centimeter.
For a waistcoat we will make some measurements. The total length of the waistcoat is measured from the cervical vertebra to the necessary bottom line. We also measure the length from the bottom line of the waistcoat to the armhole, then the semi-grip of the wide part of the trunk, ie the hips or chest, it depends on the type of figure, we measure the depth of the cutout, the length of the shoulder.
If you're a beginner knitter, then we'll do a templar. It will be useful to you in the future and you can make it from a suitable pattern of a waistcoat, whether sewn or knitted. In the sewn waistcoat, we remove the undercut, mark the lines of the bar, widen the cutout for the elastic band and under the armhole.
Let's link the sample. Calculate the number of loops horizontally and vertically. Calculate how many types of loops for the series, it is equal in size to the line of the bar, we marked it on the shelf. The bar is better tied later, it will be more elastic. We calculate the length of the product without the lower gum.
We knit the facial smoothness. Let's decide where the bottom line will be. It should be straight, and on the second edge we add loops that will depend on the shape of the cutout. The most popular V-neck. In each 4-th row add 1 loop, to form a cutout. Do not forget and every time we try on a pattern. As soon as we cut the neckline to the shoulder line, stop adding loops.
We perform the canvas up to the armhole line in a straight line. We close the hinge part to the height of the armhole. We knit to the side seam. It will not be, because the shelf will smoothly go into the back. We need seam lines, as landmarks. As soon as we get to the side seam, we'll fasten a few centimeters and add the same number of loops, as many have closed from the side of the shelf to the armhole.
From the back side, the line of the cutout is almost straight. To ensure that the waistcoat does not stick to the top and sit well, we will gradually reduce several loops. We will fasten to the beginning of the shoulder and close in 5 rows of 1 loop. Begin from the middle of the back, add loops in the same sequence. We will fasten in a straight line, from the beginning of the armhole. Do not forget that the back halves must be symmetrical.
We will perform an armhole, as we did. Let's connect up to the 2-nd side seam and try the product on the pattern. Next, we knit along a straight line from the shelf to the edge of the armhole. Add the same number of loops, which are closed, we knit right before the cut begins. We cut the loops along the cut-out line, since we added them at the beginning of the work. Thus, we will receive a waistcoat, the back will be strictly on a pattern, and the shelves will be already on the width of the bar.
We will sew the shoulder seams. We will pick up on a bottom of a product of a loop on circular spokes with smaller diameter. If the threads are thick, we take three loops for each two braids of the braids. In other cases we type two loops from each pigtail. Knitting should not be too stretched or too loose. We will try to ensure that the number of loops on the shelves is the same. We will connect an elastic band 1x1 of the necessary length.
On the circular knitting needles, we sew loops to the strapping of the cutout and to the bar. Where the rubber band is connected, we will collect 2 loops in a pigtail and make 3 loops of 2 braids.
We knit an elastic band for ½ of the width of the bar, on one of the shelves we make vertical slotted loops. Through equal intervals we close one row of the same number of loops, and in the other row we add the same number. On the width of the bar we perform elastic. Then we'll tie a series of purl loops to the hem. We will fasten to the holes, close, and then add loops and finish the elastic band. Prishem and tie a free edge. Crochet holes for buttons.
We will fasten the belts on five spokes or circular, as for knitting rubber bands. We knit the elastic band around a circle of the desired width, then we will bind it to the hem of the purl series and finish the inner bandage, sew it or tie it to the canvas. We sew buttons.