Any modeling specialist wants to achieve one of the main goals - to create perfect artificial nails. Subjective vision of the form often becomes a reference point for future masters who are trained to opilivat artificial cover. But this is not based on the technique of forming an artificial modeling layer, but on the knowledge of the foundations of geometry, anatomy, and aesthetics.
The stylist meets every day the most different types of nail bed and his task is to give all 10 fingers a symmetrical and the same shape of the artificial nail. Without certain guidelines, it is almost impossible to do this correctly. These landmarks are necessary to complete the line of sawdust of nails, and also to check the correctness of the shape. The novice master should have a clearly marked outline, in which he stages by stages how to properly shape the nails.
There are 12 main landmarks on which the quality of the artificial nail is determined.
The first line is drawn in the longitudinal direction in the middle of the phalanx of the finger. This line is the reference point for the rest of the lines.
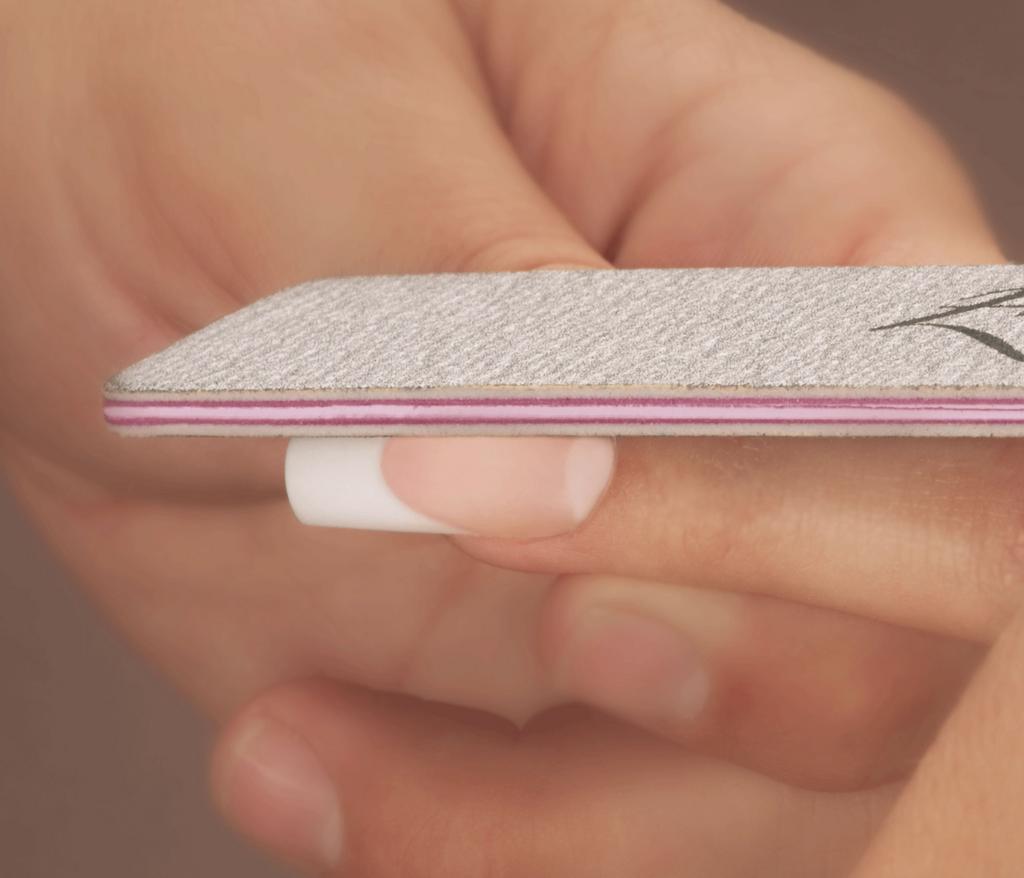
Second line - this line is perpendicular to the first line and limits the length of the free edge of the nail. The perpendicularity of the second line is checked as follows: press the fingertip of the free edge of the nail from the inside.
The third and fourth lines are perpendicular to the second line. These lines begin where the free edge of the nail leaves from the sinuses or where the stress zones end (at the point of intersection with the second line). The supposed shape is given to the free edge of the nail (the parallelism of the third and fourth lines with respect to the first line is verified as well as the perpendicularity of the second line).
The fifth line is parallel to the cuticle line. The line starts and ends on the left and right side of the stress zone. The upper third of the nail bed is filed. At the lateral part of the stress zone and the cuticle line, the artificial coating is brought to naught. The coating is applied at a 2 mm distance from the cuticle lines, and from the sides of the stress zone at a 1 mm distance. The upper third of the nail bed is filed.
The sixth and seventh lines run parallel to the first line, through the quarter of the second line (left and right of the first line). How 6 and 7 lines will be reconciled, they smoothly come to naught to lines 3 and 4. The thickness of the material on these lines should be slightly less than 1 m.
The eighth point is the highest point of the surface, since the thickness of the applied material is 1-2 mm. Here the thickness depends on the convexity of the nail plate in the longitudinal direction, as well as on the length of the free edge of the nail. If this length in the longitudinal direction does not exceed 50% of the length of the nail bed, then the eighth point will be on the first line in the middle of the nail plate. In case the length is equal to the length of the nail bed in the longitudinal direction, then the eighth point will be in the middle of the lower third of the nail bed. But if the length exceeds the length of the nail bed in the longitudinal direction, then in this case the eighth point is the eighth zone that is located on the first line and covers the lower third of the nail bed, as well as the upper third of the free edge of the nail. In this case the sawdust is carried between the sixth and seventh line and is eliminated from the eighth point to the fifth line.
The ninth line is located between the sixth and seventh line parallel to the first line. This line begins in the 8th zone, and ends at the intersection with the 2nd line. From zone 8 zone 9, the zone is sawed, smoothly descending to 2 lines, where the thickness of the material should be not less than 1 mm (create a stiffener).
The tenth line is mentally held between the 3rd and 4th line from the side of the free edge of the nail. Lines 3 and 4 intersect with the 10th line, and the points of intersection must be on the same level.
The eleventh line reproduces the shape of the 2nd line (if the nail is viewed from the side of the client). Line 11 is needed to check the symmetry of different parts of the surface.
The twelfth line completes the formation of the free edge of the nail.