As a rule, acquaintance with modular origami begins with a figure of a swan. In this article we offer you a master class on how to make origami swans, with step-by-step photos and diagrams.
Note: very convenient for origami standard leaves for notes. Each leaf is divided into two blanks for the modules.Necessary materials:
- seven pieces of dense office paper (or leaves from blocks for records), for making:
- 20 red modules;
- 24 orange modules;
- 32 yellow modules;
- 62 green modules;
- 62 blue modules;
- 60 blue modules;
- 60 violet modules;
- scissors;
- glue stick.
How to make an origami swan - step by step instruction
- Take three purple modules. To connect them in a checkerboard pattern, inserting the two upper ones into the pockets of the lower one.
- Continue the series with purple modules.
- Make a ring of thirty pairs of modules, the outer elements are fastened together. There are two rows of purple modules, thirty elements in each row.
Pay attention: in order to fix the shape of the ring, glue the corners of the upper modules with glue. In the future, the elements will be kept at the expense of compression force and glue will not be needed.
- The third row begins with blue modules.
- Dial the third and fourth row of blue modules, also thirty pieces.
- Flip the product. Compress the edges of the resulting shape with your hands in such a way that the lower ring takes the form of a stand.
- Continue the set of blue modules on top of the workpiece. Close the ring of thirty parts.
- In the next row begin to form wings. Leave in the center a pair of corners for attaching the head, dial 12 blue parts from both sides.
- Dial the next row of wings (reducing the number of modules in each row by one) from 11 green modules in a row.
- Next, form the wings according to the scheme: 10 green, 9 green, 8 yellow, 7 yellow, 6 orange, 5 orange, 4 red, 3 red, 2 red.
- Give the wings a convex shape, bend the tips outward.
- Collect a tail from three rows of modules: the first of the 3 blue, the second of the two, the last one from the green one.
- Collect the swan's neck from 2 blue, 2 green, 2 yellow, 2 orange and 2 red modules, inserting the details, into each other by a chain.
- Attach the head to the body.
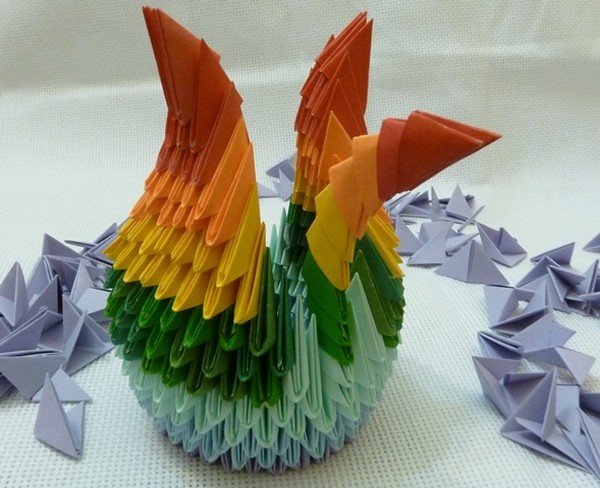
Our bright, rainbow swan is ready.
Origami of such a swan is just the first step in comprehending the fascinating occupation of the addition of paper figures. The advantage of modular origami is that you can use not only schemes and instructions for creating the next craft, but also your own imagination.