Feature "French" is that it is able to hide the shortcomings of nails, and nails acquire a well-groomed and healthy appearance. It is suitable for both celebrations (mostly weddings) and for everyday life. First of all, the bride needs to decide on the shape of the nails. The shape of the nails, regardless of the choice, should match your style. Brides, following the fashion and characterized by glamor, usually choose a square shape. A little pointed form will suit the brides, whose image carries a little extravagance. Nails of the oval form are considered classical.
Nails of medium length with an oval or square shape refer to the classic French manicure. Cover them with lacquer (translucent color), a gentle pink or gentle brown color. To give the nail a completed look, the edge of the nail is covered with opaque white lacquer. So how to make a wedding French manicure?
There are two ways to apply the French manicure:
1) Create a "smile" on the nail. It is drawn by hand or with a special stencil.
2) Use a special pencil for the inner part of the nail, making a white tip of the nail, then apply the lacquer.
At first glance, it seems that this manicure is simple, but you are mistaken. It's not easy to put this very white "smile." And specifically for "French" manufacturers began to produce a certain set of varnishes: soft pink, soft beige and white. In the appendix to this set, there are usually a cosmetic whitening pencil, stencils and even stickers.
When using stickers, you do not have to draw white "smiles", but simply cover your nails with a translucent lacquer. But the labels have a minus: they look ugly and rude.
We will give you some tips on how to properly make a French manicure:
1) Make all nails of the same shape.
2) On the protruding edge of the nail build a special primer-base. Wait until it dries, and you can continue on.
3) Now you can move on to drawing a "smile" on the edge of the nail. Use a stencil or a sticker. It is desirable to use a stencil. Put it just below the edge of the nail. It looks like a crescent moon or a "smile". And if you have pointed nails, you need to use a stencil in the form of a triangle. Putting the stencil on the nail, you can safely apply the lacquer.
4) After the dried white lacquer, cover the nail in the main tone. This will give the nails a well-groomed and healthy appearance.
Take into account several features: having drawn a thin line on the border with the "smile" and the main background, it will be easier for you to apply varnish to the edges of the nail. The white crescent should be symmetrical, i.e. evenly deviate from the nail plate.
After the completion of the French manicure, the nail should be covered with a varnish-fixer, which will give the nail a shine and preserve its longevity.
"French" can be both classic and with a twist. For these purposes, often use the French manicure, which is called "Silver". In this case, on the edge of the nail is applied a white shiny varnish and in the end - a varnish-fixer.
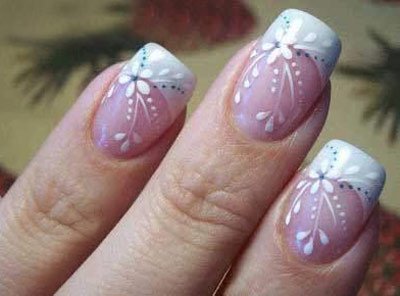
In addition to the French manicure, you can add various elements, such as rhinestones, beads, fixing them in the form of some drawing. The manicure will be more original if you can draw various drawings by yourself.
Manicure fashion, like the rest, does not stand still, constantly evolving. So, the French manicure is suitable for the style of brides, it combines harmony and balance of color. Just in this manicure you can bring something of your own with a special strip or mesh. A beautifully executed "French" will make you unforgettable at your wedding. After all, you have the opportunity.