By New Year's festivities, each of us tries to fill his house with a special atmosphere of magic. Help in this desire traditional garlands, snowflakes and "rain." But, what if all these sacramental attributes are pretty fed up? One of the main symbols of the winter holidays - a snowman, which we propose to make of paper, will help to add to your house of New Year's mood.
Three-dimensional snowman from paper with his hands - step-by-step instruction
A cute snowman with a radiant smile, standing near the Christmas tree, not only lifts the mood, but also brings a special flavor to the New Year's interior. How to make a snowman from paper with your own hands? Quite simply. First, when making a head of crafts, you need to work very quickly. It is important that the paper is soaked and obedient during binding in a bundle, rather than tearing and disintegrating in the hands. Secondly, by gluing together the details of the trunk, do not rush to fill it with sintepon. It is better to wait until the part dries well. And thirdly, filling the work, you need to periodically tamp the snowman with a pencil.
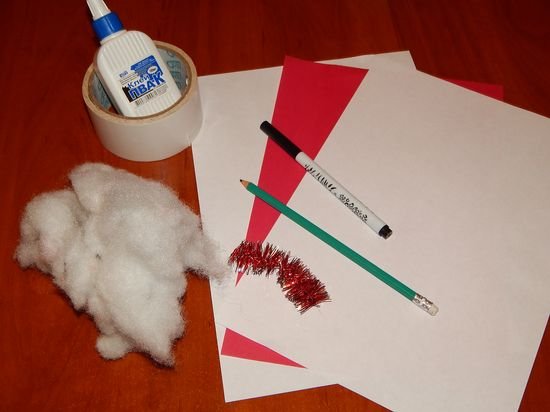
Necessary materials:
- white sheets of paper
- colored paper of red hue
- PVA glue
- strong thread
- double sided tape
- sintepon
- black felt pen
- cardboard for making a stand
Main stages:
- We begin to make a snowman from the paper from the head. First you need to cut out a white circle from a snow-white leaf with a diameter of 18 cm. We make 3 cm cuts along the circumference. We cut the cut circle for a second into water and quickly shift it onto a tissue napkin and lightly soak.
- Further we work very quickly. In the center we spread the sintepon and carefully, trying not to tear the paper, we turn off into a knot and tie the tip with a thread. Should be a ball. Put it aside to dry.
On a note! To decorate the craft, instead of sintepon, you can use other materials, such as cotton wool or small pieces of fabric.
- Now you can do the rest of the details. For hands, cut out two circles of paper with a diameter of 11-12 cm and also make cuts of 1.5 cm along the circumference. Using glue PVA glue the incisions overlapping each other. Fill the sintepon and glue the edges. We wait for the glue to dry completely and give the snowman's hands an oval shape.
- To make the trunk, take two white sheets of paper and cut out of them 2 pear-shaped forms, one of which should be slightly smaller. We make cuts along the edges and glue two parts together with glue to make a bag.
- Fill the torso with the sintepon. During operation, it is convenient to compact and distribute the filler with a pencil.
- When all the details are prepared, proceed to the design of the figure. Using a double-sided adhesive tape, attach the arms and head to the trunk.
- To make the craftwork stable, we cut out a cardboard out of black cardboard, resembling legs. We attach it to the base also with the help of an adhesive tape. From colored paper we will make a nose-carrot. Then we'll put a snowman in a Christmas cap of red color. Necessarily we cut out small circles-buttons and we will stick them in the middle of a trunk. And still black felt-tip pen we will not forget to draw eyes and smiling mouth.
How to make a snowman from paper on the window - step by step instruction
To decorate the windows before the New Year has already become a good tradition. Children, and parents, too, keen on the creative process, with the help of various materials (toothpaste, paints, paper, napkins) invent on the glass all kinds of patterns and subjects. We suggest you to cut out a snowman on a window that perfectly fits into the New Year's interior and make you happy for the holidays.
Necessary materials:
- white and colored paper
- markers
- rain
- PVA glue
- sucker with string
- double sided tape
- rain
Main stages:
- To begin with, you need to decide how exactly your snowman will be from paper. Schemes and templates can be found on the Internet, and you can draw the most simple pencil on a sheet of white paper. We cut out the finished model with scissors.
- We make cuts in the neck, eyes, mittens, caps and buttons.
- We glue the snowman to a sheet of colored paper of a red shade and, after waiting for the glue to dry, we cut it out again.
On a note! Add a special charm can be with the help of foil or sequins, which need to be fixed on the workpieces with glue. And the snowman can be completely made shiny, and separate the chimera individual elements. For example, a button or a bucket.
- Felt the nose with a felt-tip pen, draw out the wrinkles on the cap, draw a mouth in a smile. Instead of a felt-tip pen, you can also use colors. For example, acrylic paints will give crafts special clarity and brightness.
- It remains to glue the rope with the suction cup with a double-sided scotch.
- Now attach the scarf from the rain. A cute snowman made of paper on the glass is ready. And you can attach it to any glass surface or door.