We chose the most interesting model of the angel, which you can do yourself. To do this, you will need about three hours of free time and absolutely affordable materials.
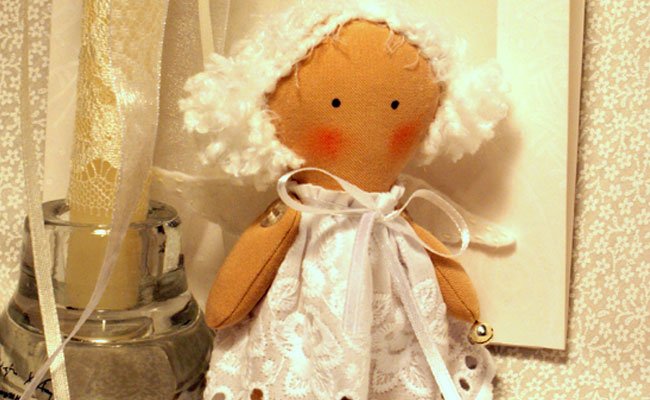
Angels with their own hands
In order to make a cute angel you will need:
- Fabric skin color to create a body
- Multicolored fabric for clothes
- Chamfer or cotton wool
- A little felt
- Tape from satin
- Threads
- Yarn of the type "grass"
- A few buttons
- Pencil of red color
- Several cotton buds
- Black acrylic paint
- A few toothpicks
- Bell
In order to properly cut the fabric you will need a pattern. You can create it yourself or use our example.
Once you have coped with the pattern, take a fabric of corporal color, from which it is necessary to make a body: fold it in half, circle all the elements and stitch them. As a result, you get a few details, each of which is a cover. We will continue to fill them with filler.
Now we need to unscrew each element and fill it with a cornflower or cotton wool. After that, carefully sew all the elements.
We proceed to the clothes. Take the fabric that you chose to create it, add it in half and stitch it. In the area of the throat we collect by thread and put on an angel.
At this stage, you need to sew a little angel handles. To do this, take the button, attach it to the expected level of the shoulders and sew to the calf. It is best to do this in parallel, that is, with one stitch to sew at once two buttons, piercing the body through and through. So they will stay well and move freely.
From yarn type "weed" make hair and fix them with threads in tone.
Where the face is supposed to be, paint the eyes with black acrylic paint, and in red pencil make a blush and lips.
Take a sheet of paper and draw a layout of the wings. Then transfer the picture to felt and cut with scissors. Stick the felt on the cardboard, so the wings will be more resistant, and sew to the back with a button.
That's it, the angel is ready. Now you can decorate it with a bell or flower in hand.
As you can see, the process is very simple and will soon bring you a lot of fun than hassle. It will be especially interesting to deal with this in the company with the child.