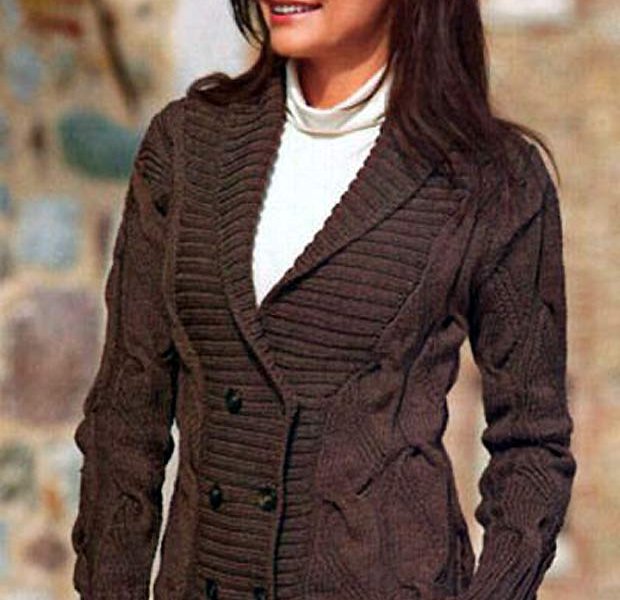
Today, different models are relevant: short, bolero-like, and as long as a coat. Supplement the cardigan with a beautiful belt, stylish accessories and you will not be reflected. A very important feature of the cardigan is that it suits both the built-up and the magnificent ladies. Everything depends on the chosen model.
Any woman who knows how to hold spokes in her hands can independently tie this useful thing. It is made of wool, woolen or twisted yarn. It is better for beginners to choose simple patterns for knitting and single-colored yarn. Those who consider themselves a mastak in this matter, can choose a pattern povakovyriste or create a multi-color product. It all depends on your taste and imagination. You can make a cardigan delicate, airy - for the summer. And you can warm, winter. Solve onlyonly you.
For work you will need knitting needles (# 3, # 4 or # 5), 1000 grams of medium-thick yarn. For final assembly of the product you will need a sewing machine.
Operating procedure
To begin with, it is necessary to calculate the loops. The density of the mating should be 21 loops and 26 rows in the sample 10 by 10 cm. Tie the specimen. If you have other figures, try to take the knitting needles to a thinner or thicker number. However, you can make your calculations and continue to work, focusing on them.
As already mentioned above, cardigans are different: long and short, free and well-fitting. Choose what suits your figure. Multiple knitting patterns can be found in magazines for needlewomen.
Back
Knit this model from the back. This order is preferable to other things connected with their own hands. If in the course of work it turns out that the thread is not enough, and you can not buy absolutely the same for some reason, you can easily modify the model by making a different fabric color on the front cloth shoe. If you can successfully combine the color of the yfaktur thread, the product will only benefit from a similar replacement.
For product size 44-46, you need to type 108 loops. Spray the main color according to the chosen scheme of 172 rows, before decreasing the hinges for the armhole. In order to tie the armholes, after 172 rows begin to evenly loosen the loops from both sides of the work. In the first row, you need to decrease 5 loops, in the second row, 4, then 3, 2, and 1 each. There should be 78 loops left on the spokes. After 60 rows, begin to weave the shoulder bevels. To do this, in each 3 row you need to close 4 loops. You can not hide the loops in each row, but simply leave them, not knotted on the spoke, then close everything in the last row. This can be removed from the "gradation". Then in a single row close all the remaining after the binding of the bevel of the loop. Get a neckline.
Shelves
To unscrew the right shelf, type 23 loops and tie the main mesh 172 of the row. Then, on the wrong side, just like when knitting the backrest, close the hinges for the armhole. After 60 rows, also make a shoulder bevel. In parallel with this, loosen the loops on the other side to get the cutout of the neck. On both shelves, it should be absolutely the same, otherwise it will look ugly on the finished product.
Leave the left shelf symmetrically right.
Sleeves
Type 58 loops and tie 26 rows with the main pattern. Next, you need to add a loop. On both sides of the work you need 3 times every 12 rows and 3 times through 14 rows add 1 loop. On the spokes after the completion of all the additions, there must be 70 loops. After 120 rows, start lowering the loop of the pellet. For correct reduction, you need to cut 3 loops in the first row, the next two loops, then eight loops of 1 loop, then three loops of 2 loops and the last 3 loops. If you did everything right, the loops are not left.
Similarly, the second sleeve is pulled out. You can knit at the same time dvuhrukava. On one spoke, but from different coils. This will help avoid problems with knitting.
Pocket
Type 26 loops and tie 26 rows. Close all the hinges in one row.
Planks.
The straps are the same. Type 230 loops and knit 40 with a straight pattern.
Assembly
Sew the details better with a sewing machine. The finished product at this is much more accurate than when assembling by hand. Stachtebokovye and shoulder seams. Fold the sleeves face down and sew them. Insert the sleeve into the armhole of the product. Sew a pocket on the shelf at 22 cm from the edge of the product. Attach the bar. Do not forget about the buttons. In modern stores, they have a different taste: from strict classics to funny and original models. Choose what most of the design corresponds to your creation.
Well, as you can see, it's not so difficult to create a unique thing with your own hands. She only benefits from some unprofessional execution. And the fact that it is performed by its hands, will make it even more beloved.