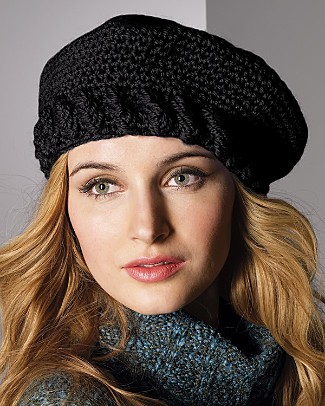
Beret is not only a beautiful headdress, usually associated with France and French women, it is also quite a convenient and fashionable accessory that brings to your image a bit of romance and femininity. There are many reasons for choosing what to take with your hands, rather than buying a standard beret in a store. The most important of them can be called that, firstly, this beret will be unique, and secondly, it will fully meet your tastes and preferences. In addition, it is not difficult to knit a crochet for needlewomen who are slightly familiar with this knitting technique.
To do this you need:
- Special threads, usually take wool, silk, paper threads, zinelka or soutache.
- Crochet hook.
- Minimum knitting skills with a hook.
- A little patience and time.
Instructions
First of all, decide which beret you will knit and for whom - for yourself or someone as a gift, etc. Then you can start the process of knitting. If you already have the initial skills of crocheting, then you will all come out. One of the important points in the beginning is the right choice of thread for knitting. If you are in doubt about what exactly you need - consult a consultant in the store, he will help you choose the best option. Here, and decide on the color of the future headgear. Currently, fashionable are bright accessories, so do not hesitate to choose a thread of bright colors.
After choosing the shape of the future beret and materials for it, it's time to start directly knitting. Knitting beret starts from the middle. First of all, five or six air loops are recruited, after which we close them in a ringlet and tightly tie into it columns without a cloak, as much as fit there. After that, he takes a knit in a spiral fashion, that is, two stitches should be added to each eyelet, measuring the spacing in one loop. Do not forget about the fact that you must take into account the thickness of the material you choose, that is, if the threads are thin, then you can add columns, and if thick, then on the contrary, reduce. The third row represents an addition to the already connected two, which must be done exactly the same way through the loop. All subsequent rows need to be knit a little less often, so that the increment itself is less frequent. The main thing is to carefully monitor the circle to keep it flat. To achieve this, you need to add loops, make sure that the circle does not shrink. If the mating is too loose for you, then it is necessary to add a bit less often, that is, to knit the rows without adding sticks.
In order to connect the correct, truly beautiful beret, you must strictly adhere to the main rule - knit, adding as many stitches in the rows as you added in the second row. It is also worth remembering that it is best that the distance between the columns should remain the same everywhere, which leads to, for example, that if the first row consisted of seven columns, then in the second one already it is necessary to connect fourteen and then in the same way.
So, suppose that the beret circle of the required size is ready. Next, you need to link several rows without adding bars. The number of rows that are knit in this way depends on the thickness of the selected threads. After this, we must begin to reduce the number of loops per row - when knitting each column, you need to remove two loops. Remember the previously described rule of uniform addition - it should be used also with the process of decreasing the columns. In addition, in order for the beret to be tied correctly, it is worthwhile to make sure that the column that you add does not get over or under the added column. The same can be attributed to the reduced columns of loops.
The last stage of beret knitting is very simple - you remove the columns until the beret reaches the desired length, remembering to ensure that the beret is flat. The mating is completed by means of several dense rows. After that, it takes to decorate with beads, ribbons or other similar decorative elements to your taste, or just leave it as it is - it's ready!