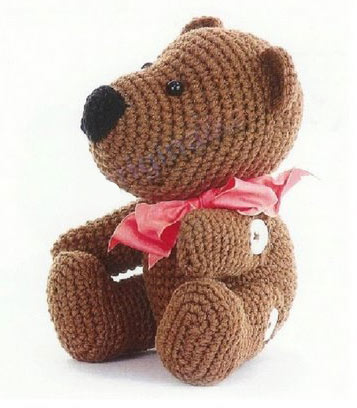
Bear cub - one of the most favorite toys of children of many generations. And this cute creature can not remain indifferent to adults either. Often it turns out that the assortment of such products in stores does not correspond to our ideas about an ideal toy that would become a friend. But do not get upset, because even a beginner can tie a toy-bear crochet as he wants. It is necessary only in the course of work to stuff a toy with a filler.
In order to get started, you need to have all the necessary materials. So, you need: a needle, a hook, beads, thread and filler. When you prepare everything you need, you can start work. Threads can be taken in any color, but if you want the product to be fluffy and soft, choose the material of the corresponding texture.
Knit start with the head of the bears. First you need to dial two air loops and close them in a circle. At the same time, tie 6 through the second air loop. It is important to make 6 increments in the next row, so that 12 loops result.
The new series must be knit without crochet. Further it is necessary to do increments after the first, second and other loops, including the 42nd. Further 3-4 rows of knit without changes and with decreasing. Before you finish the binding, fill the head of the product with a filler, and tighten the last 6 loops and secure with a thread.
If you set out to correctly tie a bear with a crochet, then the torso for it must be knit in the same manner as the head, only the maximum number of loops should be no more than twenty-four and the packing must be made before you begin to tighten the loops.
The legs, like the hands of a bear, must be knit so that they are proportional to the trunk, but slightly longer in shape. First, an increase is made, after which they are knit without any changes. When you finish them - be sure to make a decrease. Filler stuff the limbs best of all separately.
Just before you start knitting, it's best to think about how you will shape the bear's face and what you want to wear it.
There are quite a few design options. You can pinched a connected face. Look pretty bear eyes, embroidered with threads of mulina. Also, you can glue or sew some beads as eyes.
A nose toy can be embroidered, but if you knit a big bear, then the easiest option is to tie it, for example, in two pieces of iris - in this case it will come out more neat and you will avoid difficulties with sewing, saving your time. The shape of the nose can be different - from triangular to oval or semicircular.
However, the process of knitting is only half the battle. It is necessary in fact to collect a bear cub. First, ears are fastened - they are without filler, so they are simply sewn. After that, the pin is fastened with a pin, and then sewed on the front hinges. Preliminary it should be lightly filled with filler.
After that, you form the muzzle in the way you need - attach and fasten the eye beads so that they are slightly higher than the protruding part of the head and on each side of the triangular spout. The needle is drawn through the hole behind the head of the toy and a long tail is left, tie a knot at its end. We string another bead and pass it to the same part, then tighten it, so that the eye does not move, we fix and cut off the rest of the thread. The same is done for the second eye. Eyes should be attached separately, so if something you do not like - you could remake them one at a time.
After that, the mouth and eyebrows are usually embroidered, so that the expression of the desired expression is obtained from the muzzle of the toy.
Particular attention deserves such a detail of the muzzle as a nose. An unusual, bright and large nose, suitable in tone to the rest of the muzzle, can make the bear cub quite interesting.
Lastly, the head is sewn to the body, after it - the handles, and the most recent - the legs. To do this, you can use a thread or a special mount that allows the finished toy to produce certain movements.
So, as you could see, you can connect the toy yourself, and it's not difficult at all.