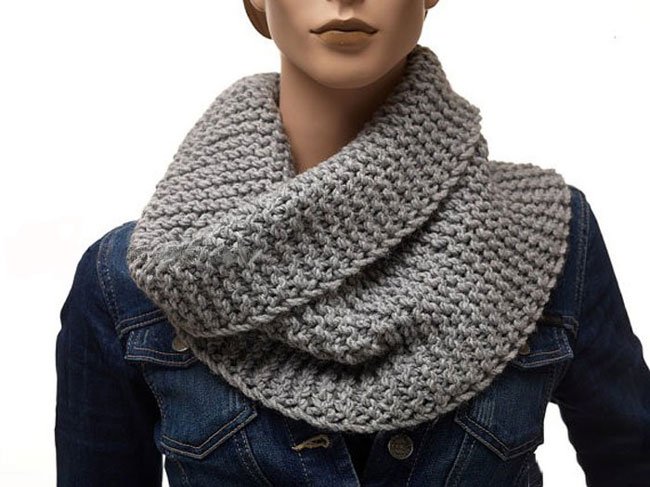
A simple, but at the same time, a beautiful scarf-yoke can be tied up for several free evenings. To do this you will need:
- Yarn, you need color and thickness. There will be enough three balls of 100 grams each.
- Two needles. Their size should be chosen based on the shape of the future scarf. If you want to make it lush, choose a higher number of spokes and vice versa.
- A little patience
How to knit a scarf-collar with knitting needles?
The way of knitting a scarf is extremely simple. This is done by the "English gum" method. It does not matter whether you knitted before or not, you can master it very quickly. In any case, we will tell you what he is.
English rubber band
First imagine how wide a scarf you need. Next, starting from this value, type loops.
- Remove the edge and start tying the loops.
- The first row is knitted according to the scheme: one face loop, the second - purl.
- The second row: one face, then a straight cape, then remove the purl loop and do not bind the right knitting needle.
- The third row: we knit the front with the crochet, we should get a double loop. We tie her up from the top. After this, make a crochet and remove the wrong loop on the right knitting needle.
Next, to the very end we knit the product according to the scheme of the third row. Once you are comfortable with the technique of knitting an English gum, you can safely be mistaken for a scarf-yoke.
Let's start knitting
Suppose that you have already typed the desired number of loops on the spoke. The first loop must be tied, and the extreme you will shoot. Next, we knit the first row: all the external loops are removed with casting, and the rear we sew.
The second and all subsequent rows are knitted according to another scheme: the previously removed loop with a cast is tied on the back side, and the outer one must be removed with casting. So you need to tie all the rows, which will turn around 230. When you get to the end of the loop you must close it.
Now you have a nice knitted rectangle, which must be folded twice and sew the edges to make a scarf-yoke. As you can see, the process is not at all complicated and will not take much time.
If you want to tie a scarf-clasp to a magnificent one, it will be enough for several hours of work, for a denser knitting you will need a little more time. You can make it of any length, use a variety of techniques of knitting and drawing. In a word, the fantasy is welcomed and will make your scarf original and unique in its kind.