Line: diameter - 0.22
Line consumption: about 50 meters for one product - one third of the standard coil
- beads of any size (transparent and rainbow)
- beads are faceted (0.5, 0.8 and 1.0 cm).
- hook knitting for weaving beads from beads (small: 1-3 mm.)
- jewelry pliers, pliers and round pliers.
- scissors
- organizer for beadwork
- pins jewelery (pins) - 2 pieces
- 2 filigree caps
- connecting rings (2 pcs.) and a snap hook
- extension chain with decorative suspension
Beads of beads and beads - step by step instruction
- Preparation for work. For convenience, lay the table with a soft cloth. Decorate the beads and add them separately. Beads and accessories put in the organizer.
- Descent. For a three-dimensional product, you need to make a minimum of at least 4 meters. It is possible less if the decoration is almost weightless, or more - everything depends on taste preferences.
Note! Do not cut the line. To continue to work, you must periodically shift the strung beads towards the coil.
- Knitting of air loops.
We make fastening and knitting the simplest chain of air loops, "grabbing" beads. For larger volumes, it is recommended to bind several beads at once. To give airiness - often alternate such loops with idle ones. As a result of weaving beads from the beads, the chain will be very long, so it's better to gradually roll it into a tangle.
Note: to make the work look more impressive, it is better to do 2-3 idle loops to each large bead and after it.
- Fit by the standards. We measure the sections of the chain, according to the standards. Here the length of the first row is 40 cm. The length of each subsequent section is gradually increased.
- Assembling the necklace. Loose chain loops are inserted into the slightly unbent "ears" of the jewelry pins - as in the photo and also fix the ends of the other segments.
As a result, both pins will become holders for all series.
- Fastening the accessories. When we plait beads and beads from beads, there are "tails" on the ends of the product: they need to be hidden and trimmed. For each pin, put on the cap, then the beads. End the pin with a clipper and twist it.
- Attach the fasteners.
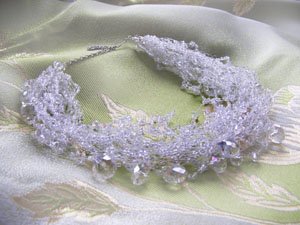
A beautiful necklace made by own hands is ready!