Step-by-step instruction for sewing Panama for children with their own hands
To begin with, we note that for summer panama it is worth choosing exceptionally lightweight cotton fabrics. Natural materials are pleasant to the touch, allow the skin to "breathe" and at the same time reliably protect the baby from overheating. Do not forget about the bright shades that will not only make Panama bright and interesting, but also will make it possible to see the child in a crowd, for example, on the beach or a playground.
Necessary materials:
|
|
Pattern Panama bell for girls
- The Panamanian pattern is quite simple and requires only a few measurements:
- h - depth (measured from ear to ear, through the crown, the value is divided by 2)
- L - head circumference
- h 1 - width of fields (we estimate individually)
In our master class the above values were as follows:
- h = 30/2 = 15 cm.
- L = 51 cm.
- h 1- 7 cm.
- Panama bell for the girl consists of 6 wedges. We will build one. Consequently, L 1 is the width of one wedge equal to the length of the head circumference divided by 6. L1 = L / 6. In our case: 51/6 = 8.5 cm. We build the pattern as in the figure. Cut the fabric pattern and cut.
- We need to get 6 identical parts. For convenience, the fabric can be folded several times. We prick the pattern to the wrong side of the fabric with tailor's pins. It should be arranged so that the line h runs parallel to the edge. We surround the part with a simple pencil or soap. We make allowances for seams 1 cm, at the bottom - 1.5 cm and cut.
Sewing of children's panama-bell
- We break the wedges together with tailor's pins and alternately spend it.
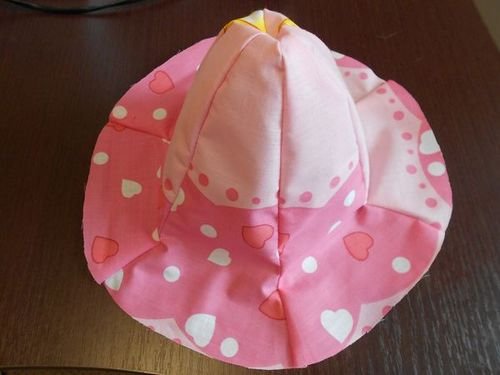
- The resulting blank will first be flat, but after sewing the last seam, the product acquires volume.
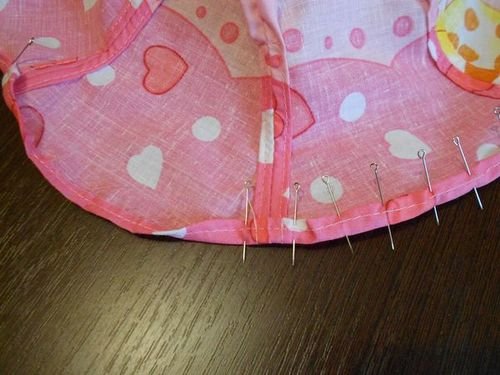
- We turn the product to the wrong side. We smooth the seams in different directions. We bend the edges, pin them with tailor's pins, otstrachivaem on the typewriter. This will allow the panama to hold the shape better and make the underside neat.
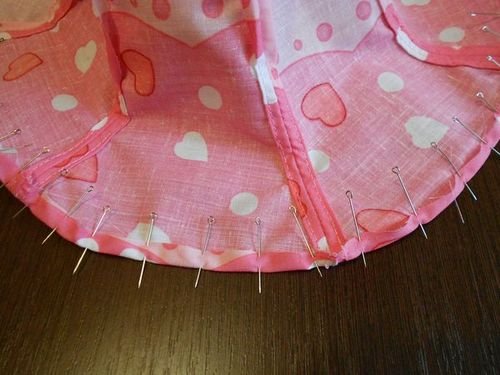
- The edge of the product is turned once, we chop and we spread it.
- Fold the second time, chop off and again make a line. It turned out a neatly processed edge of the product.
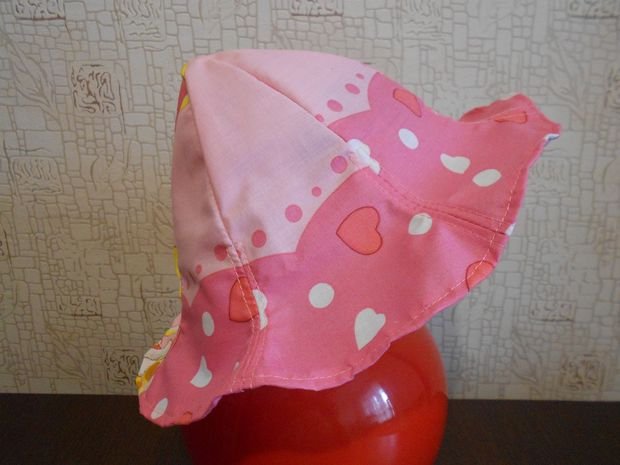
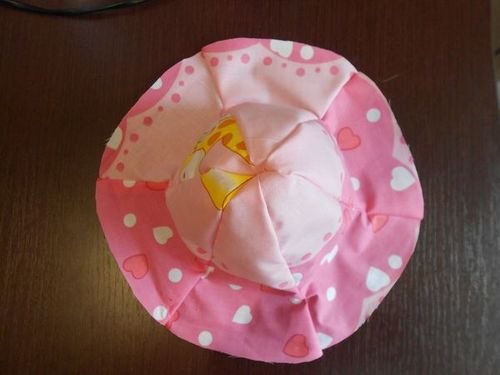
- Panama bell for the girl - ready! In such a headdress, the little fashionista will look great, and her head will be reliably protected from sunlight.