What is the dry felting?
Felting out of wool is a method of needlework, which appeared a very long time ago. Using this method, needlewomen created a variety of pictures, toys and panels. When dry felting, the wool is often pierced with a needle, thus ensuring that it acquires a bulk shape. When the wool is pierced by a needle, the fibers interlock together, and a dense, uniform material is obtained.
Waving from the wool can create any toy that only draws your imagination. And in this article we will talk specifically about how to make an owl with the help of dry felting out of wool.
How to make an owl?
For the production of an owl we will need six-wool wool. You can take any shades, but in this case, the following color palette will be used: light and dark brown, red, white, yellow and black. For work, a plum, sponge or felting mat will be used and triangle needles number thirty eight and forty.
The basis of the owl is a plum. It is necessary to take a piece that is twice the size of a toy, which in the end should work. Izmesvera it is necessary to roll the ball, and so that on both sides it was a little dragged inside. After this, a needle is taken in the hands number thirty and a sponge begins to form the basis of a suven. The base should be cylindrical, and from above it will be round, and from the bottom it will be flat, so that eventually the owl can be placed on some surface. After you have made the base from the siver, you have to start wooling on it. If you make a small figure, pieces of wool must also be small and dense. Take care that the coat is not visible anywhere, and you can not see the fiber of the sliver. Otherwise, the figure will not be monotonous, and it will look ugly. The breast of a suven should be made of light brown wool. For this, it is necessary to seal the wool to the base with the help of the same number thirty-eight needle.
Next, proceed to felting the back and forming a head of an owl. To do this, it is necessary to wrap the trunk on top and behind with a dark brown coat and gently prip it. And, it is necessary to roll so that the fibers eventually form a semicircle where they join with light brown wool.
When the back and the head of the owl is ready, you need to start the grinding process, with which you will make the figure smooth. For this, a needle number forty is used. It is necessary to spread the fibers so that the wool becomes dense and any holes that could appear in the felling process are missing in it, since the needle number thirty-eight is thicker.
Next, we take two identical pieces of white wool, a needle number thirty-eight and we lay circles on which the eyes of our youngest will be fixed. After that, you need to take the number forty again and stick the flagella, made of yellow wool. Then we make small black balls in the center of each white circle - this will be the eyes of our sovenck.
Now the turn of the beak has come. In order to dump it, you need to take a small piece of red wool, place it below the eye carefully to seal.
After that, it's time to start forming the wings for the owl. It is necessary to take two identical pieces of dark brown wool and pile their wings. We do this on a sponge and use a needle number thirty-eight, then grind the wings from below with a 40th needle. At the top of the wing there is no need to densely prick, as they will have to be attached to the torso by birds.
After the wings are ready, they are lapped to the top of the trunk by the suvenk. Make sure that the wings are not attached to the bird's body at the bottom, but freely stick out to the sides.
Now it remains to finish the ears, tail and paws. For the need to take two small pieces of wool of dark brown color andprivalyat them to the head, and then, with a needle number forty turn them into brushes.
For the tail, a larger piece of hair is taken, it tucks to the lower part of the body of the catcher, and then it also turns into an egg.
Well, the last detail is, of course, paws. They need to be formed from two pieces of red wool, which have the same dimensions. We make paws from them and we put them on the base.
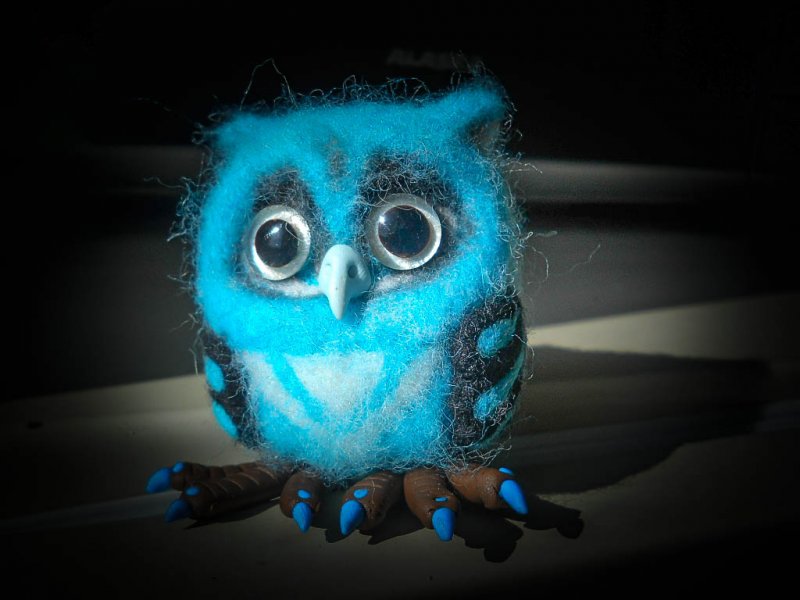
That's all, our sweet soft owl made of wool is ready. In this way you can make a toy of any size. Everything will depend on how much wool you take. The main thing is that all pieces are proportional. Wool can always be taken "by eye", and then simply remove the excess, dry felting allows you to add and clean parts with a few touches.
Such an owl can be left to itself, given to a child who will have fun playing with such a cute bird or give it to a girlfriend who loves herd's.