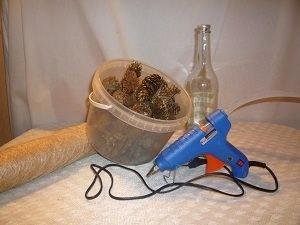
- Paper (preferably dense)
- Glass bottle (better transparent and with an outstretched neck)
- Newspaper
- Sisal (we took a golden color)
- Glue gun (you can use any quality and good glue: glue Moment)
- Cones
- Elements of decor (ribbons, tinsel, etc.)
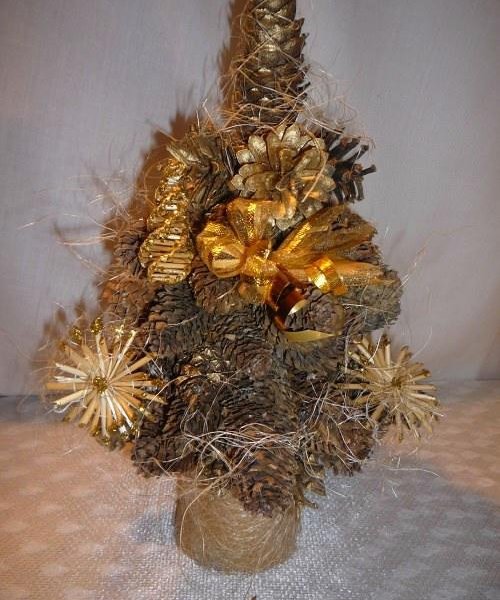
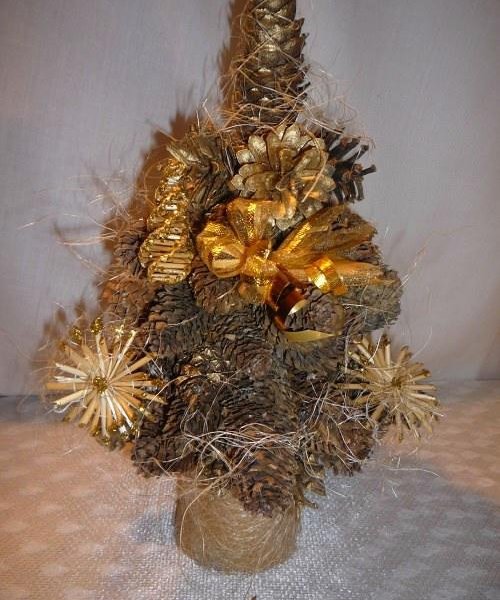
Making a Christmas tree out of cones: step by step instruction
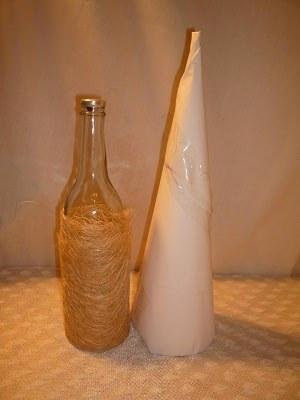
- Let's start our work. Take the bottle and the entire lower part of it (up to the neck) wrapped in three to four layers of sisal. You need to wrap it up so many times until the sisal will not be visible. The stand under the tree is ready. Let's make a basis for the most beautiful: from the prepared paper we will curtail a cone which will be approximately on 1/3 above a bottle. The cone should be on the bottom from the bottom approximately from the bottle, so that when holding tightly held.
- We now turn the resulting cone into sisal, again in several layers, so that the sisal adheres to the paper and does not shine through. Then we put the resulting cone on the harvested bottle. In the event that our cone fails and closes the entire bottle, leaving the legs do the following: we take the newspaper, mnem it and stuff it with our cone (from above, so that the cone does not completely fall down or on the sides, so that the cone would hold).
- We pass to the main work (our cones). Take our glue gun and start top-down on the cone glue cones. How to glue them depends only on you and your imagination, you can start and not from above, you can leave gaps, and then fill them with tinsel or any other ornaments, you can leave them in sight. It will look nice if you sort the cones (from the largest to the smaller) and glue them as follows: from the top are the smallest, increasing their size to the bottom.
- After we glued all the cones onto our cone, go to the final stage (the decor of our unusual crafts). To do this, you can paint certain bumps in the color you like, you can apply a little glue and sprinkle with sequins. Bind it with various bows, throw tinsel, use the remains of sisal. It depends on you and your imagination, your preferences, the style of the interior or the tastes of those to whom you are going to present this wonderful gift.