No matter how fashionable now are gloves from the most delicate natural leather, it is still, perhaps, Russian winter where it is better to wear knitted warm mittens. Mittens (gloves) always served not only to warm their hands in frosts, but also were an important decorative part of clothing. Since the Russian winters were always famous for their frosts, the mittens were worn by representatives of all walks of life. They had a lot of names - shubnitsy, mohnatki, vanuchi, sleeves, leather jackets, little girls, hoodies. In addition, they knit themselves.
In fact, there are no special difficulties in tying mittens, no. If you know the craft of knitting, and you know about such varieties of loops as purl, air and facial, then you will be able to tie yourself a couple of mittens. Knitting mittens on knitting needles is available even for beginner needlewomen, but if you have a lot of experience in this business, you can easily connect not just mittens, but a fashionable and beautiful accessory for wearing in the winter.
You can crochet mittens crocheted. There is also the so-called grandmother's knitting - while each mitten knits with circular knitting using five spokes. This method is also used for gloves, for tracks, for mittens, and for socks. And you can use two knitting needles, with the help of cross knitting, with one suture or two halves. This method is the simplest.
Knit mittens on two spokes
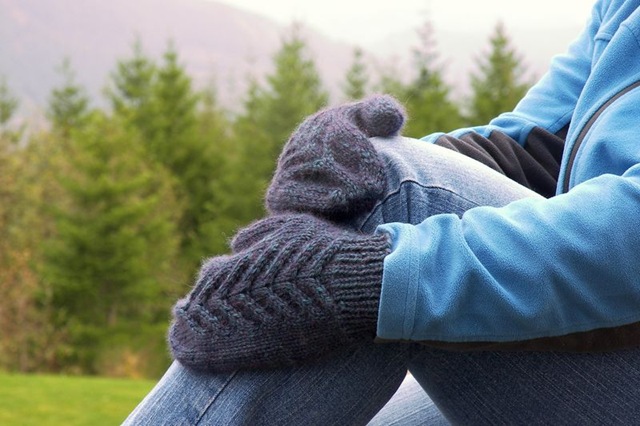
First you need to select the yarn. The sleeves can be knitted from mohair, wool, downy yarn - which you like more. By color they can be made in multi-colored, monophonic or melange. Before knitting decide what you want - do your mittens need drawings, or, perhaps, it will look better a relief pattern? Mittens can have an ornament, a jacquard pattern, be delicate or striped, with bumps, pigtails or fringe. Cuffs on the mittens are often knitted with an elastic band. Depending on the chosen pattern and size, one mittens can go from forty to one hundred and fifty grams of yarn.
To tie mittens on two spokes, it is necessary to separately connect the lower and upper sides, which then are joined together by a crochet or simply sewed together. To begin knitting it is necessary from the back side, having typed on spokes such quantity of loops that to correspond to width of a palm with a stock. Knit (with or without pattern) to the end of the little finger. After that, remove the hinges from both sides, tying together a pair of loops together. The result should be a workpiece with a triangular cape. If you want to make a rounded toe, the loops need to be gradually removed, leaving only a third of their original number open. Put the rest of the loops in a safety pin. Everything, the back side is ready.
After that, you begin to unfasten the palm or lower half of the mittens. Link it a little more difficult due to the fact that it is on this side of the thumb is fastened.
The beginning of the palm is knit in the same way as the back of the glove. After you finish tying before the start of the thumb, you must divide the loops into four parts. Three of them you pin with a pin, as on the back side, and one you put on knitting needles so that the thread coming from the tangle turned from the sharp side of the knitting needle. On the second spoke you need to dial the same number of air (new) loops with the aid of an auxiliary thread (this thread must be of a different color). Further, these loops must be tied with a thread from the coil (thread from the first knitting needle). Continuing to knit further, you will see that the rectangular ledge has turned out. This is the thumb of the mittens in the unfolded form. When you tie it to the right size, you need to collect all the open loops on the other thread or pin and the thread from the coil should be cut off.
Next, you need to pull out of the knitting auxiliary thread (it is at the base of the thumb). Loops that opened and removed earlier need to be worn on the spoke. With a thread from the tangle, untwist the palm, just like the top of the mitten.
Having tied everything, it is necessary to sew a canvas of the big finger, using a knitted seam, and loops which remained open - to tighten a thread and to fix from the wrong side. It remains only to sew the two halves of the glove and that's it.
So, without much hesitation, grasp the spokes, choose the pattern and thread for the desired mittens and sit up to knit!